You know, PrestaShop 1.7.5 has been released recently with a lot of improvements , there are available 3 types of product:
- Standard Product: It is a physical product as clothing, fashion, electronics, …
- Virtual Product: It is a download product (e-book/PDF files), service, booking or downloadable games, phone applications, software upgrades, etc
- Pack of Product: It is a combination of at least two existing products
If your store is launching for a service, booking or downloadable product, they are virtual products. Here is tutorial for you.
This tutorial, we will guide you “How to Create Virtual Product Prestashop 1.7.5” – Leotheme Blog
Steps are familiar with tutorial “How to Create Simple Product PrestaShop”. But they will have some differences. Here are all steps:
- Create New Virtual Product PrestaShop 1.7.5
- Create Virtual Product PrestaShop 1.7.5 Settings
- Create Virtual Product Pricing PrestaShop 1.7
- Optimize SEO for Virtual Product PrestaShop 1.7.5
- Option Tabs – Create Virtual Product PrestaShop with Visibility, Condition & References Customization, Attached files
Table of Contents
I. Create Virtual Product PrestaShop 1.7.5
1. Create New Virtual Product PrestaShop 1.7.5:
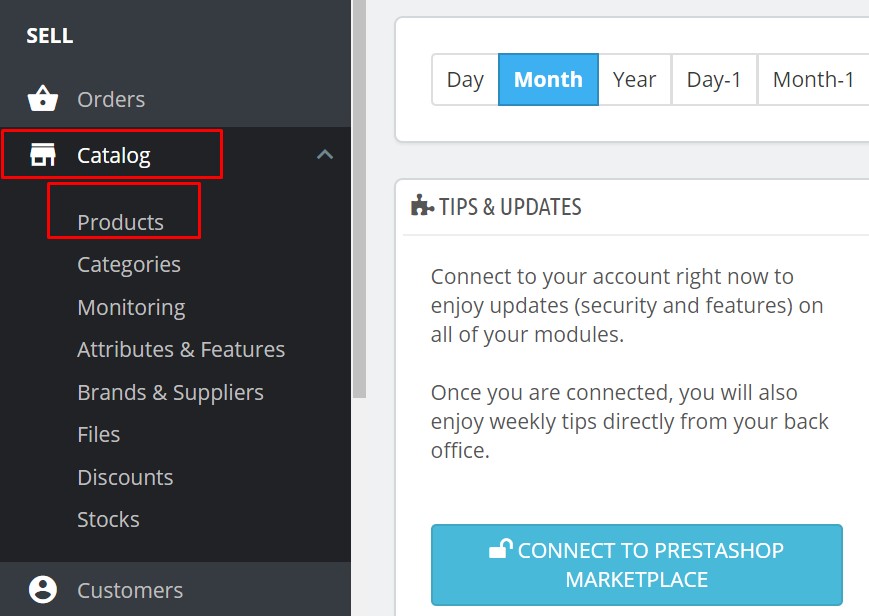
Login Admin Dashboard -> Catalog -> Products
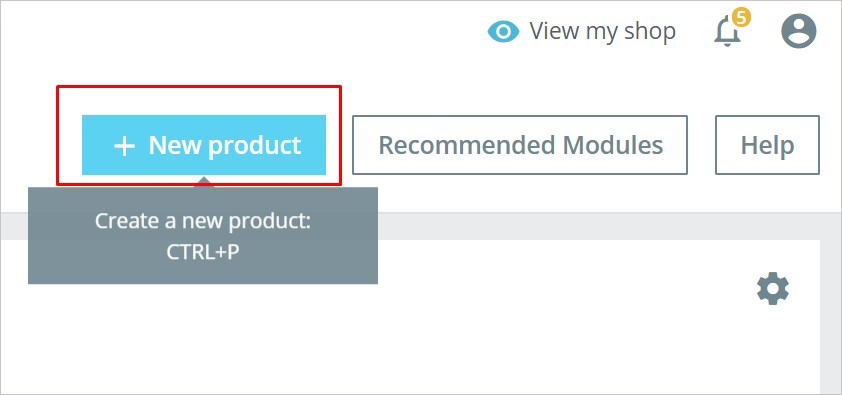
Click at “New Product” or “Ctrl+P”
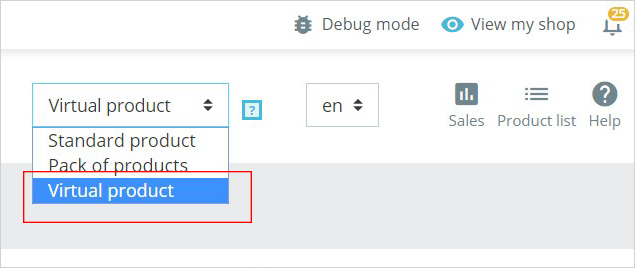
Basic Settings for Virtual Product
Fill all information for virtual product:
When you choose “Virtual Product” from the dropdown list, the organization is changed.
Enter your Product Name: Named your product
- Reference – the internal reference code for this product.
- Quantity – set the available quantity of the product for sale.
- Price – the retail price at which you intend to sell this product to your customers.
- Categories – choose the category your product will be assigned to.
- Image – you may add an image to the product.
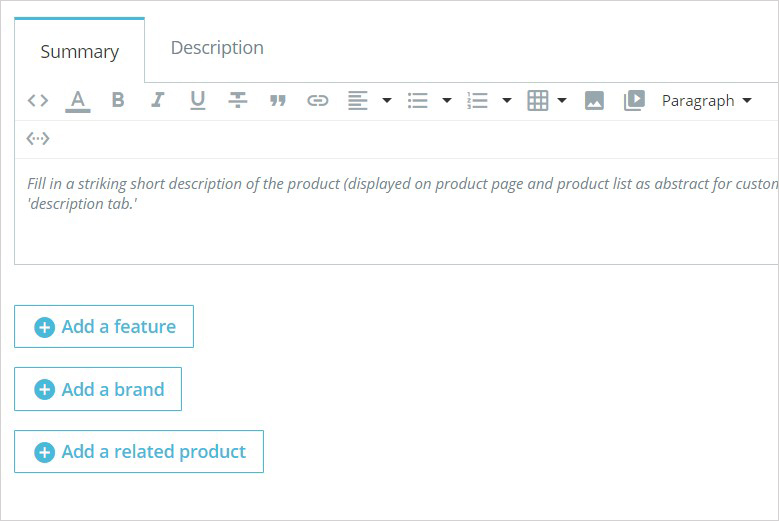
- Summary – short description of the product.
- Description – description of your product.
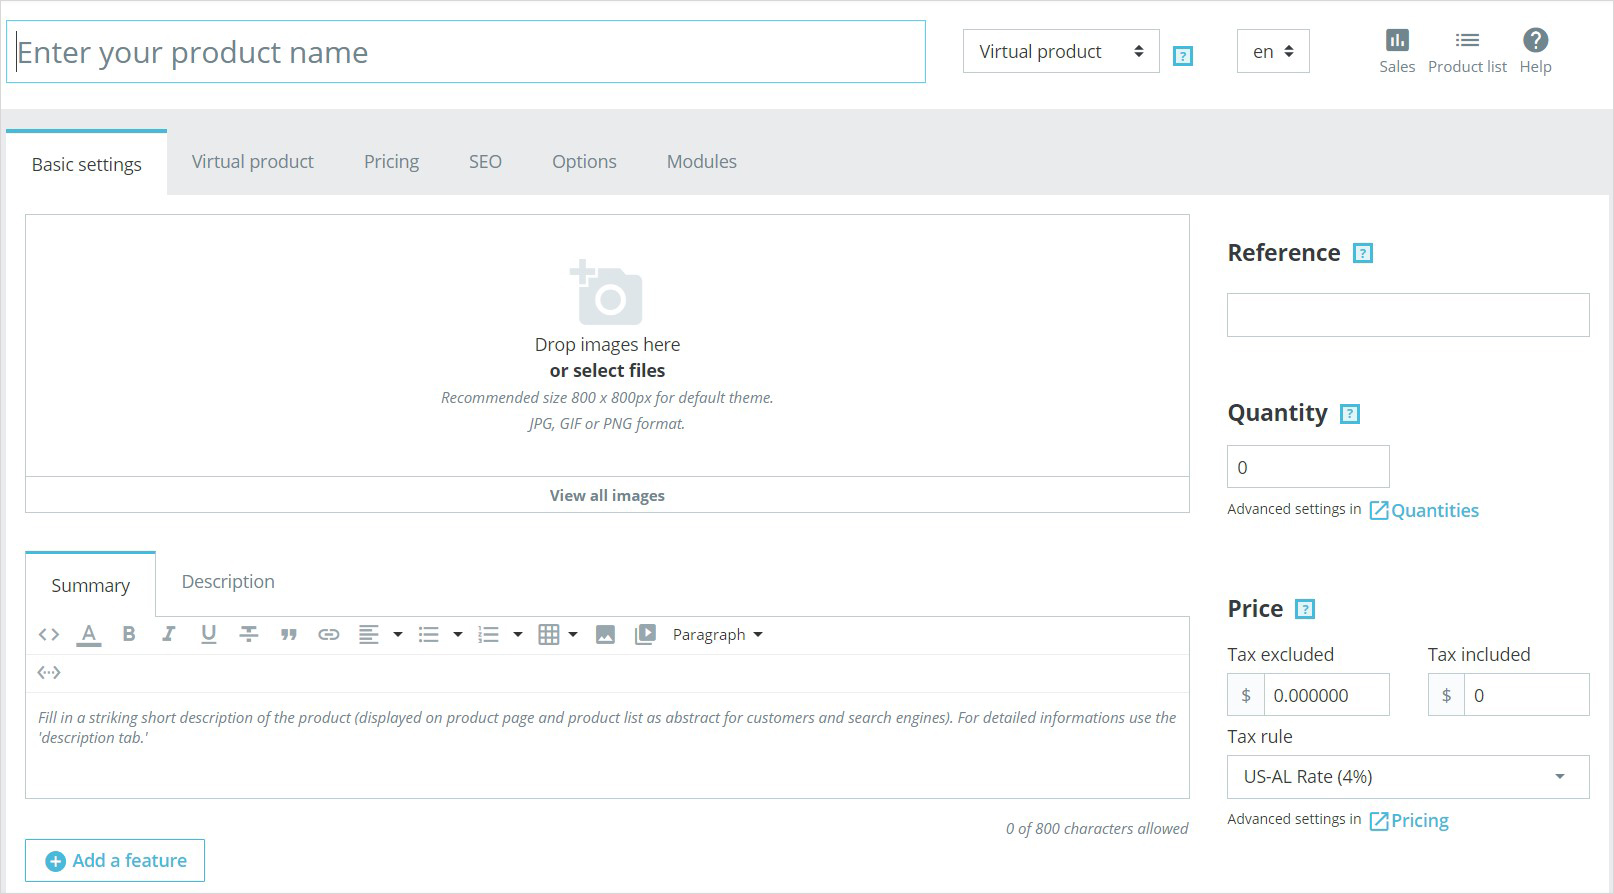
And you can add a Feature, Brand, Relate Product too.
2. Create Virtual Product PrestaShop 1.7.5 Settings:
Navigate to Virtual Product Tab:
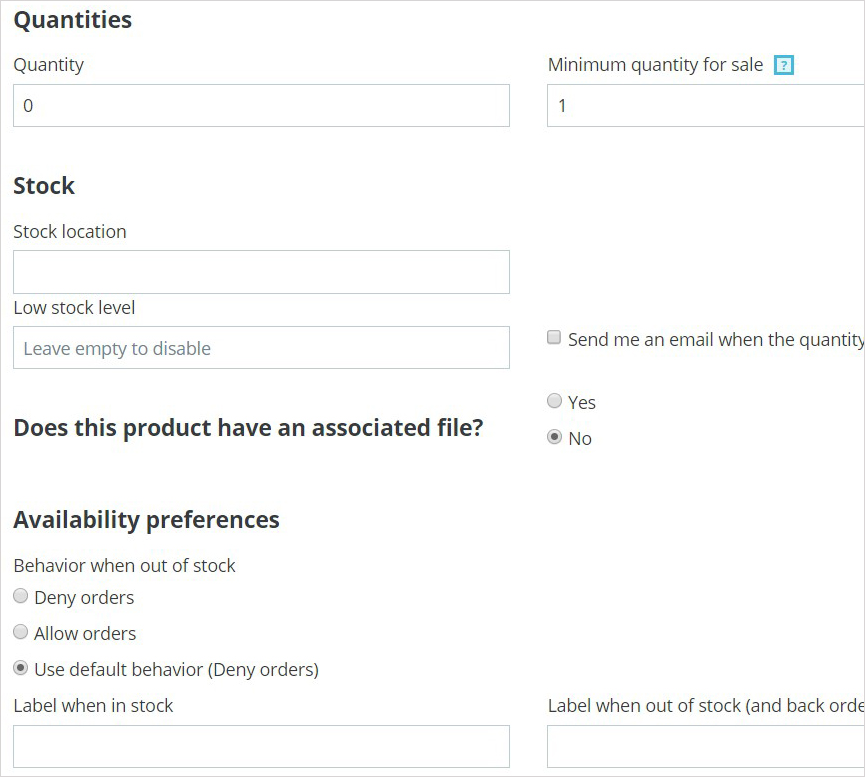
- Quantities – set the quantity of the product.
- Does this product have an associated file? – if you tick Yes, PrestaShop will open a new form on the tab, from which you can upload the file you intend to sell.
- File – click the Browse button to upload the file from your computer.
- Filename – the name of the file. This field is automatically filled after the file has been uploaded. It is not recommended to change it to another value.
- A number of allowed downloads – you can set the number of time the file can be downloaded once the customer has bought it. You might prefer to limit this to 1, or 5. If you want to keep it unlimited, set the text field to 0.
- Expiration date – virtual files can be of promotional nature or lose their selling value after a certain date. If so, you can set the expiry date after which the product will not be available in your shop anymore. Leave it blank if there is no expiry date.
- A number of days – you can set a number of days after which the downloaded link becomes non-functioning. If there is no limit, set the text field to 0.
- Available preferences – the role of the product when it is out of stock.
3. Create Virtual Product Pricing PrestaShop 1.7
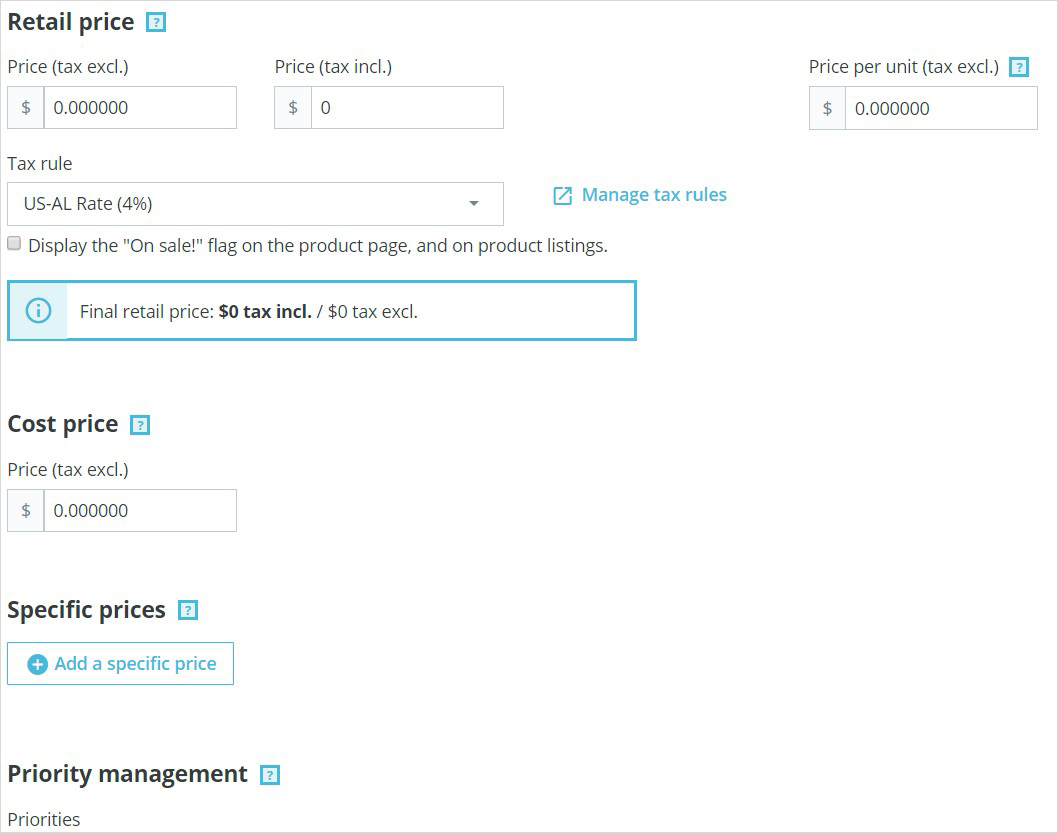
At Pricing Tab: Allow to set all price information, cost price, specific prices for promotion or coupon & priority managements
- Retail price – set the price which you intend to sell your product.
- Cost price – the price you paid for the product.
- Specific prices – you can set the specific price for your product according to the groups, countries, etc.
- Priority management – you may define which rules apply first.
4. Optimize SEO for Virtual Product PrestaShop 1.7.5
In PrestaShop 1.7.5, you will get new SEO improvements PrestaShop 1.7.5 in SEO Option.
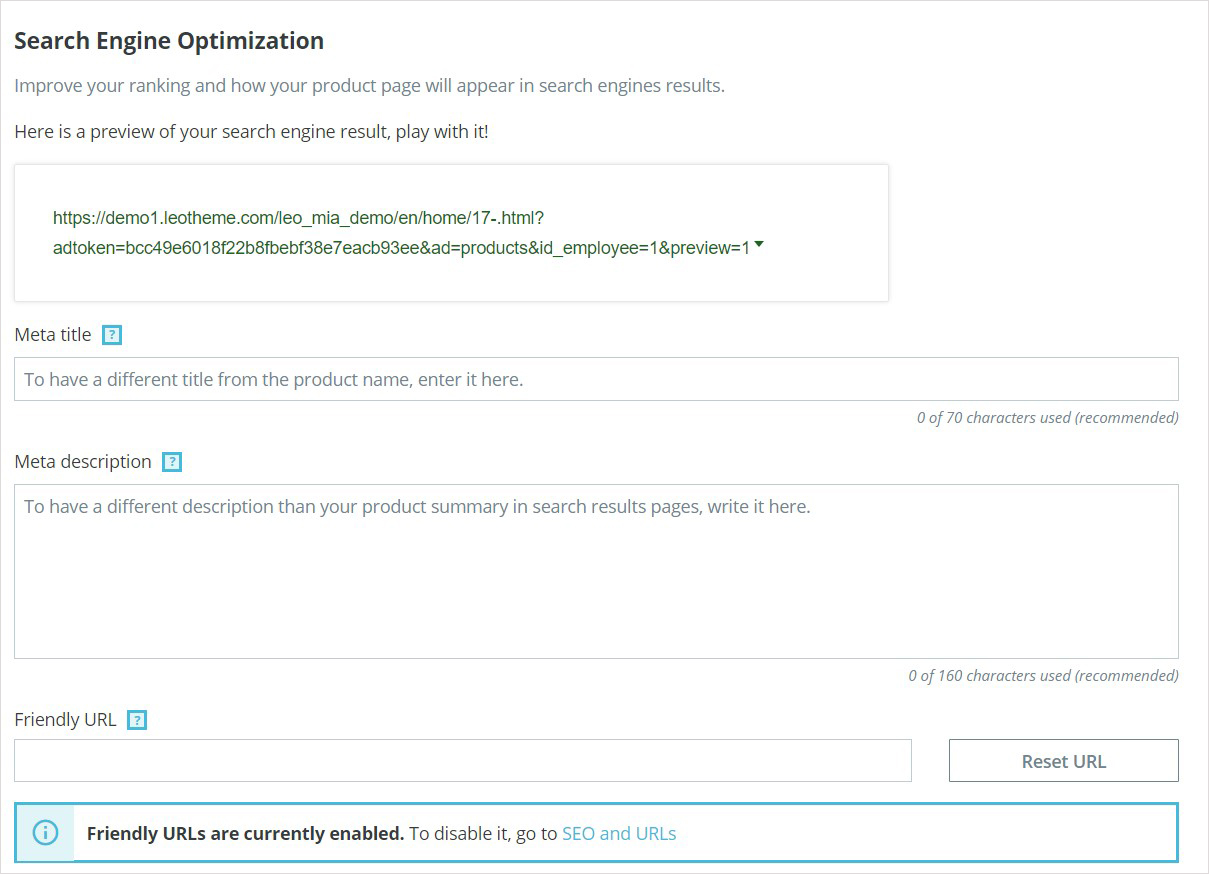
- Search Engine Optimization:
- Meta title – public title for the product’s page.
- Meta description – the description of the product that will appear in the search engines.
- Friendly URL – the URL generated from the product’s name.
- Redirection page – when the product is disabled, you can choose to which page you would like to redirect the customers visiting its page. It is possible to choose: no redirection (404); permanent redirection (301); temporary redirection (302).
5. Option Tabs – Create Virtual Product PrestaShop with Visibility, Condition & References Customization, Attached files
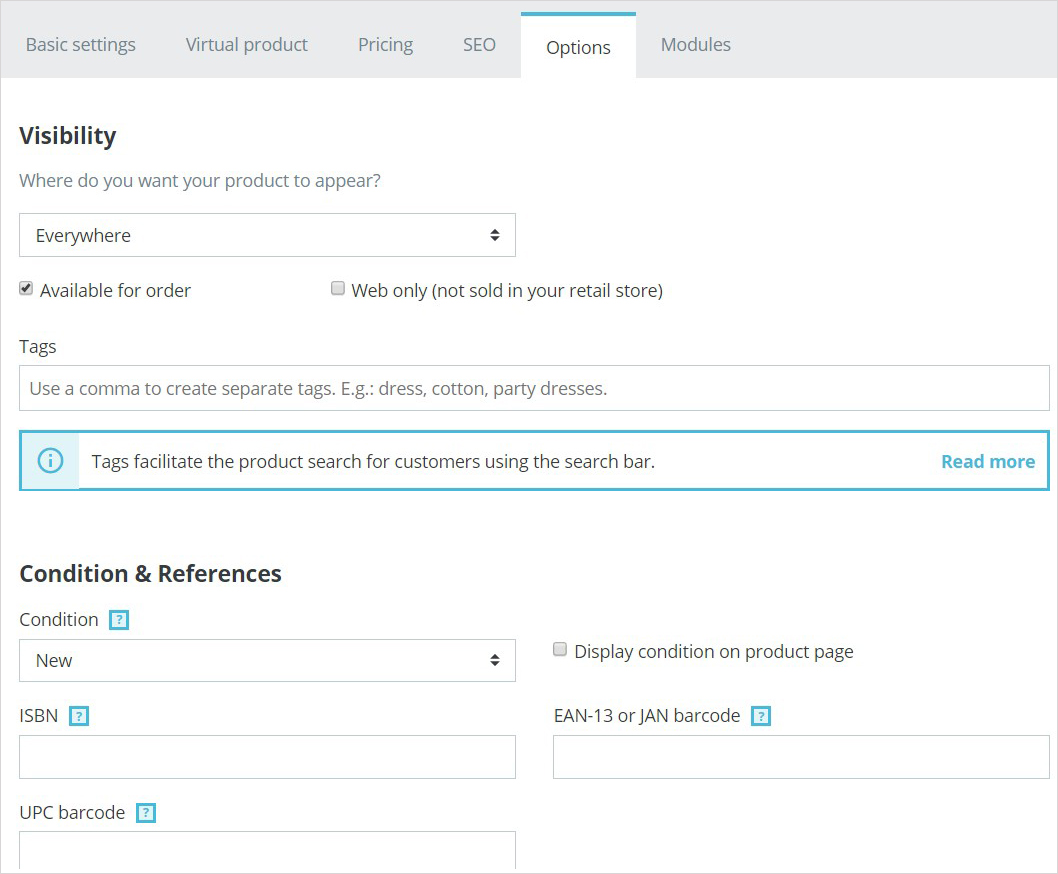
Here you can add all visibility, condition & references,
- Visibility – you can choose where to display your product (everywhere, catalog only, search only, nowhere).
- Condition and References – option enables you to indicate the condition of the product:
- Condition – the state of the product. It may be new, used or refurbished.
- ISBN – identify books and their various editions internationally.
- EAN-13 or JAN barcode – the code is specific to Europe and Japan, but is widely used internationally.
- UPC barcode – the code is widely used in the United States, Canada, the United Kingdom, Australia, New Zealand and in other countries.
- Customization – the ability to add additional text and images to the product.
- Attached files – additional files that the customers can download directly from the product page.
- Suppliers – specify the suppliers of the current product and its combinations.
Click the Save button. Refresh your page to check the product.
This guide already helps you“How to Create Virtual Product PrestaShop 1.7.5”(also for latest version 1.7.5). Hope it helps your installation & configuration well.
Related Prestashop Tutorials:
- PrestaShop 1.7.x: How to Install PrestaShop 1.7 Default Theme
- How to Install PrestaShop 1.7 Default on Server | PrestaShop 1.7 Tutorial
- PrestaShop 1.7 Tutorial: How to Add New Category PrestaShop 1.7
- Quickly Update PrestaShop Theme 1.7 for Product Page & Category Profile
- New Theme Folder’s Structure of PrestaShop 1.7
- Prestashop 1.7 Is Released | PrestaShop 1.7 Features You Should to Know
- 10+ Secret Prestashop 1.7 SEO Tips to Get Higher Rank for Store
- PrestaShop 1.7: How to Add Shortcodes in Ap Page Builder Module – Leotheme
- PrestaShop 1.7 Tutorial: How to Add New Category PrestaShop 1.7
- 8 Secret Tips PrestaShop Security Best Practices for E-Store – Leotheme
 Prestashop Themes and Module Blog PrestaShop News, Tutorials & Marketing Tips




Great article! Thank you 🙂