At that time, Prestashop 1.7 has officially released the latest version. Today, we will provide you a guide “How to Install Prestashop 1.7 Default”
As soon as the PrestaShop 1.7 Default is successfully installed on your store, you can see a default PrestaShop theme appears at the site front-end.
To install PrestaShop 1.7 Default, you should follow steps:
-
- Step 1: Download PrestaShop Software from Prestashop.com
Extract file PrestaShop
-
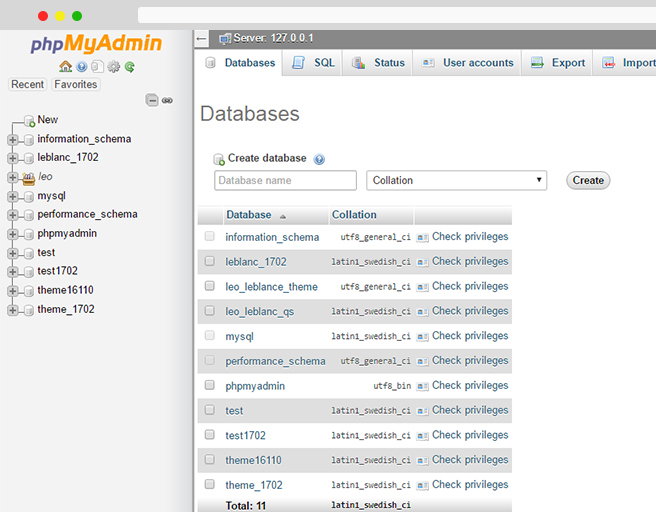
- Step 2: Prepare Database on Server
- Step 3: Fullfill Store Information
Install Prestashop Default Languages
Install Prestashop Default License
Store Configuration
Store Installation
Here are detail guide “How to Install PrestaShop 1.7 Default on Server”
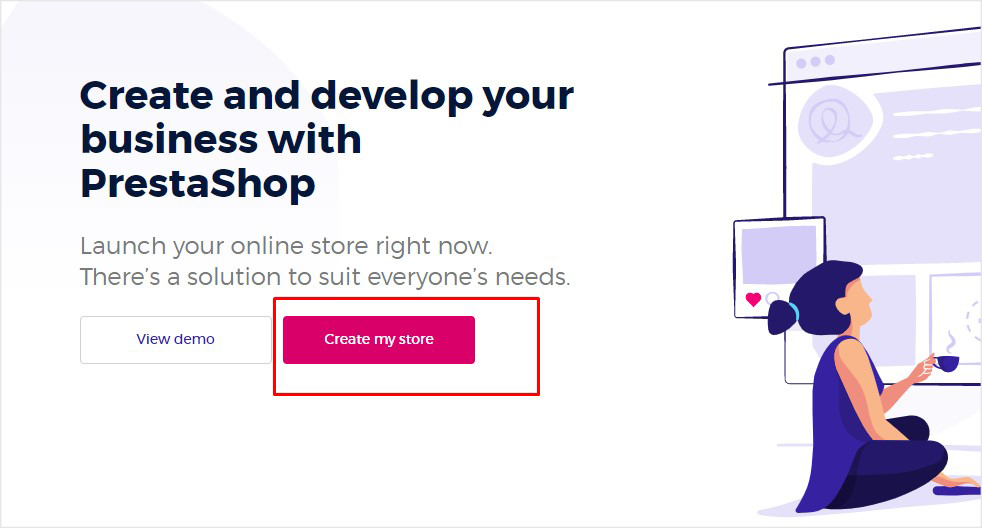
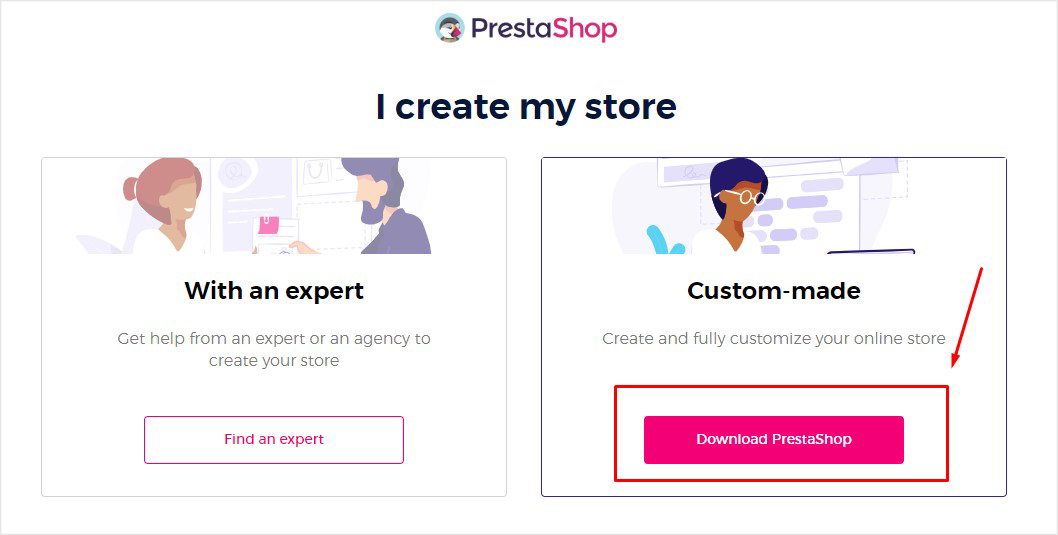
Step 1: Download PrestaShop Software from Prestashop.com
Go to PrestaShop.com -> Create My Store
And Download Prestashop Default:
When you download file zip success.
Please extract this file:
You will have 3 smaller folder: file index, file html and file zip PRESTASHOP.
Extract file zip PrestaShop and install.

Step2: Prepare your database on server:
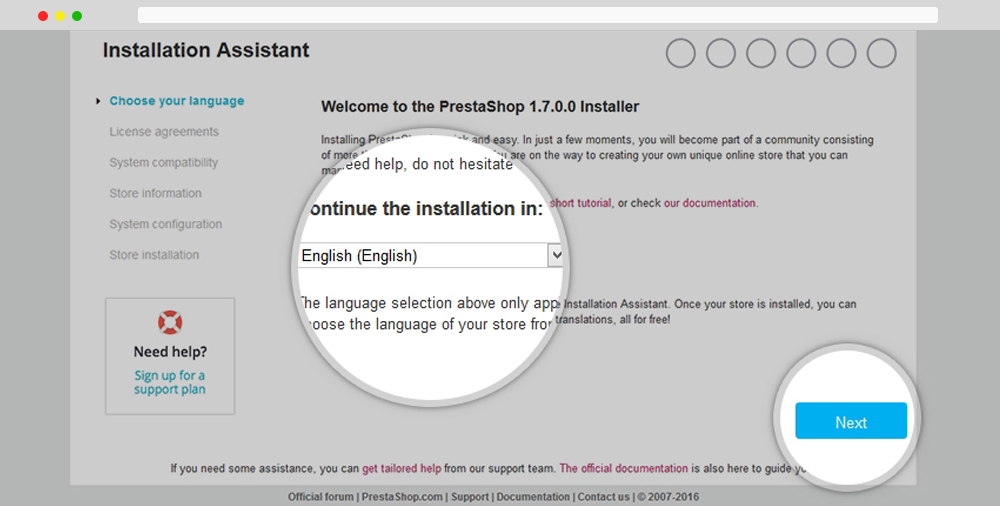
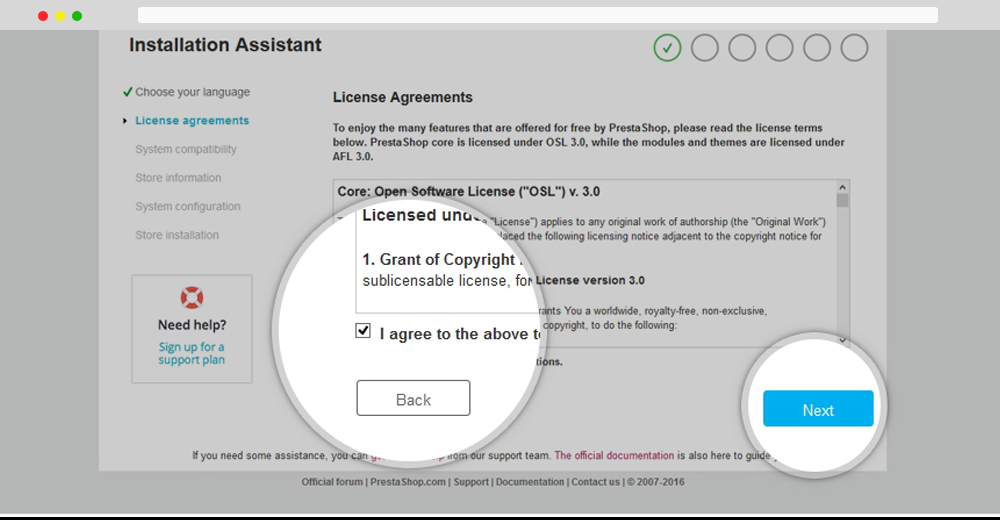
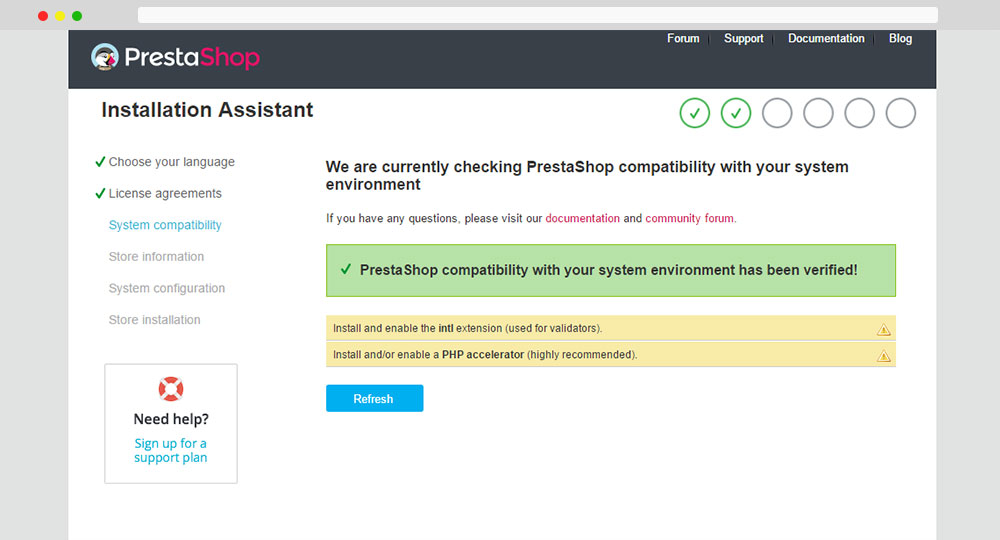
Step 3: Follow install process, you fulfill your store’s information with following steps
– Choose language: You click and setting language for your store.
– License agreements: When install, you should agree with Prestashop Terms and Conditions.
– System compatibility: This step is informed that the system is fine to install Prestashop 1.7.
Note:
Version PHP required: ≥ 5.6
When you install “System compatibility” step, you may face with this errors, do not worry and follow our guide:
First of all stop the xampp/wamp and then kindly remove the starting semicolon ( ; ) from your xampp/php/php.ini the following code.
;extension=php_intl.dll
– Store Information: Complete information store here, remember Email address and Shop password to access Back Office.

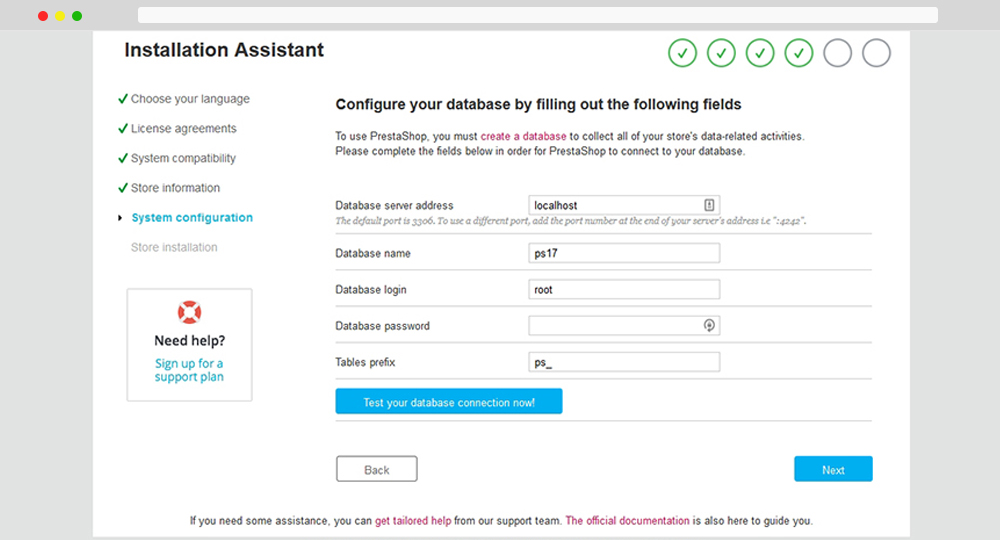
– System configuration: Add database information to install your site: database server, database name, database login, database password and tables prefix.
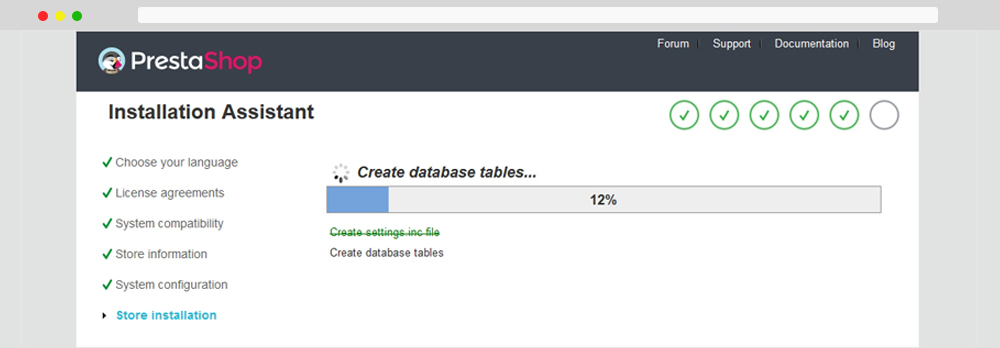
– Store installation: You should be patient to wait process 100% success.
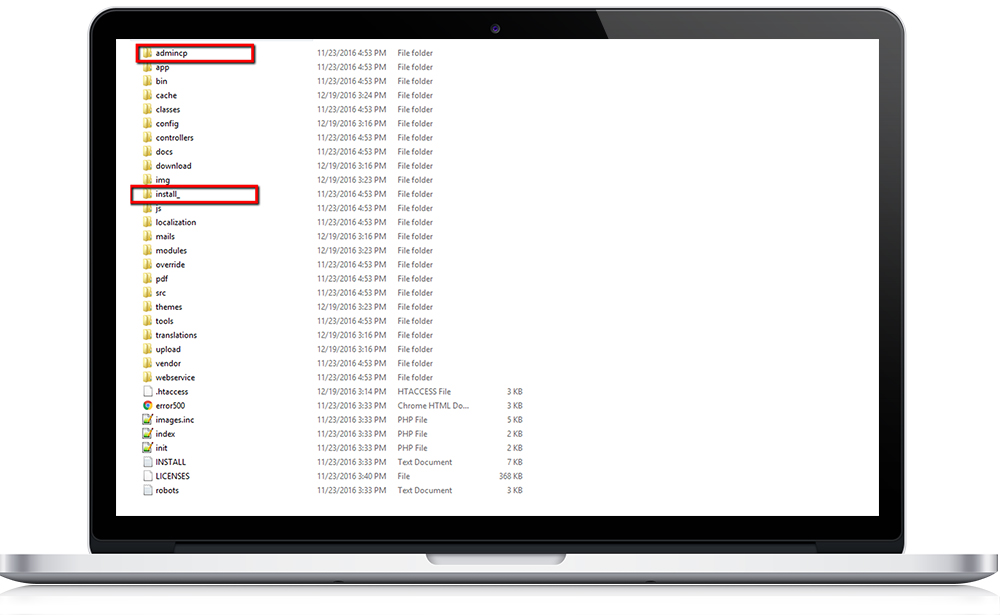
When the install process is finished, we should configure some folder inside.
Folder “admin” will be changed admin… (Some character, we suggest that you may rename into admincp or something else)
Folder “install” should be backup/rename/delete.
The Result:
– Back Office:
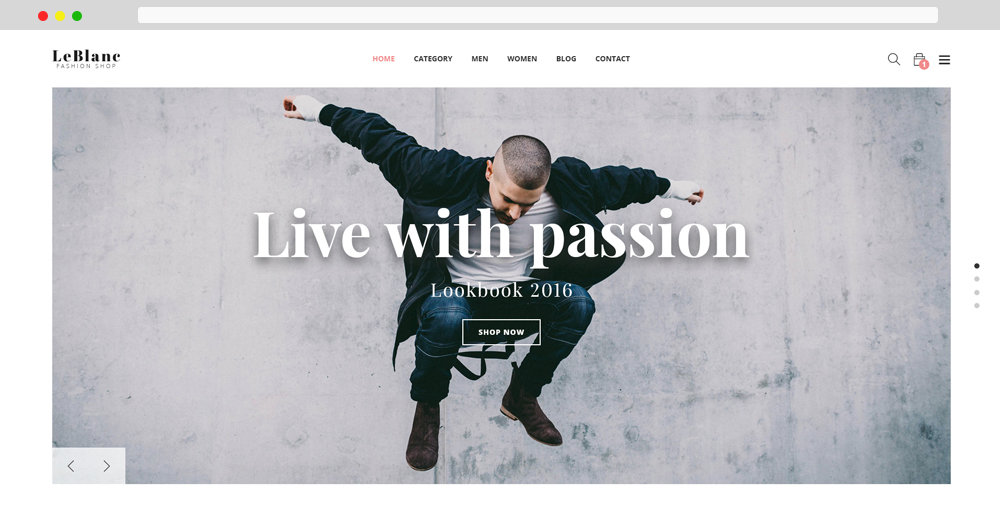
– Front Office:
Tutorial Video to Install Quickstart theme with Prestashop 1.7
First of all, we would like to thank you for your interest in our work. We are working hard to deliver best Prestashop Themes
Related Post:
- PrestaShop 1.7.x: How to Install PrestaShop 1.7 Default Theme
- How to Install PrestaShop 1.7 Default on Server | PrestaShop 1.7 Tutorial
- PrestaShop 1.7 Tutorial: How to Add New Category PrestaShop 1.7
- Quickly Update PrestaShop Theme 1.7 for Product Page & Category Profile
- New Theme Folder’s Structure of PrestaShop 1.7
- Prestashop 1.7 Is Released | PrestaShop 1.7 Features You Should to Know
- 10+ Secret Prestashop 1.7 SEO Tips to Get Higher Rank for Store
- PrestaShop 1.7: How to Add Shortcodes in Ap Page Builder Module – Leotheme
- PrestaShop 1.7: How to Change RTL PrestaShop Theme 1.7 – Leotheme
- 8 Secret Tips PrestaShop Security Best Practices for E-Store – Leotheme