
This blog will guide you how to use and customize Leo Parts Filter Module fluently.
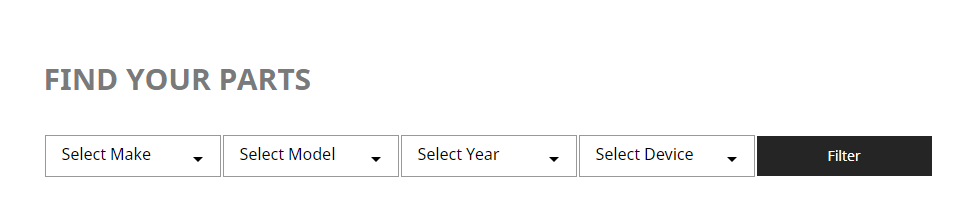
Introduction: Leo Part Filter is a module designed for PrestaShop online store to help promote customer experience by optimizing searching on site. In detail, when customers visit the site, instead of typing a keyword into searching box as normal, they can easily access target items quickly with few clicks. This module supports 4 levels of searching corresponding with 4 searching fields. Buyers enable to increase searching level from 1 to 4 respectively to get more exact results.
Configure Leo Parts Filter Module
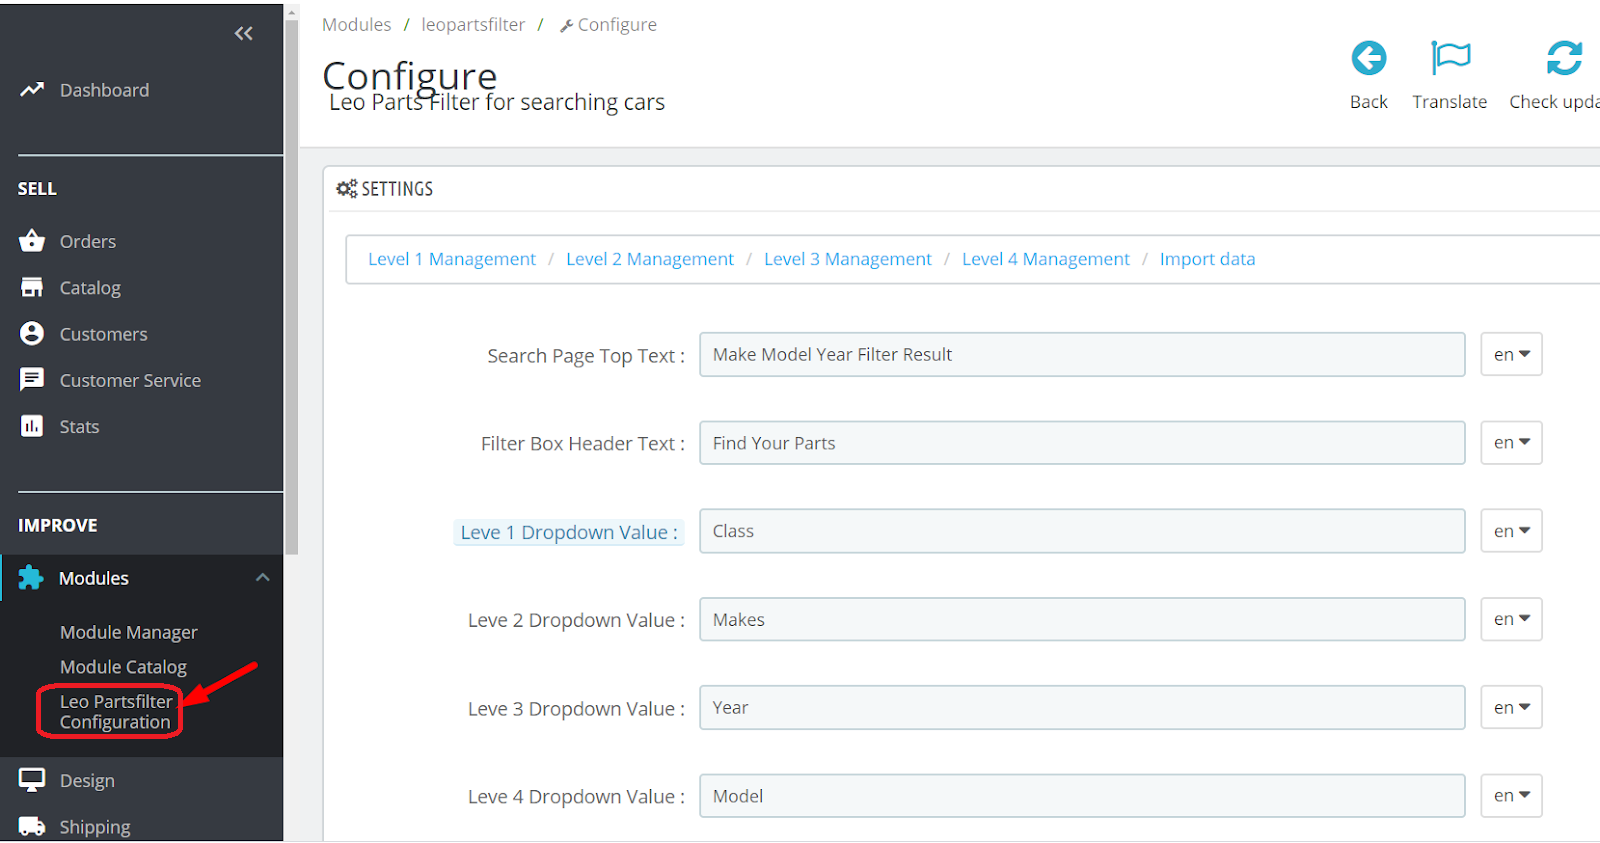
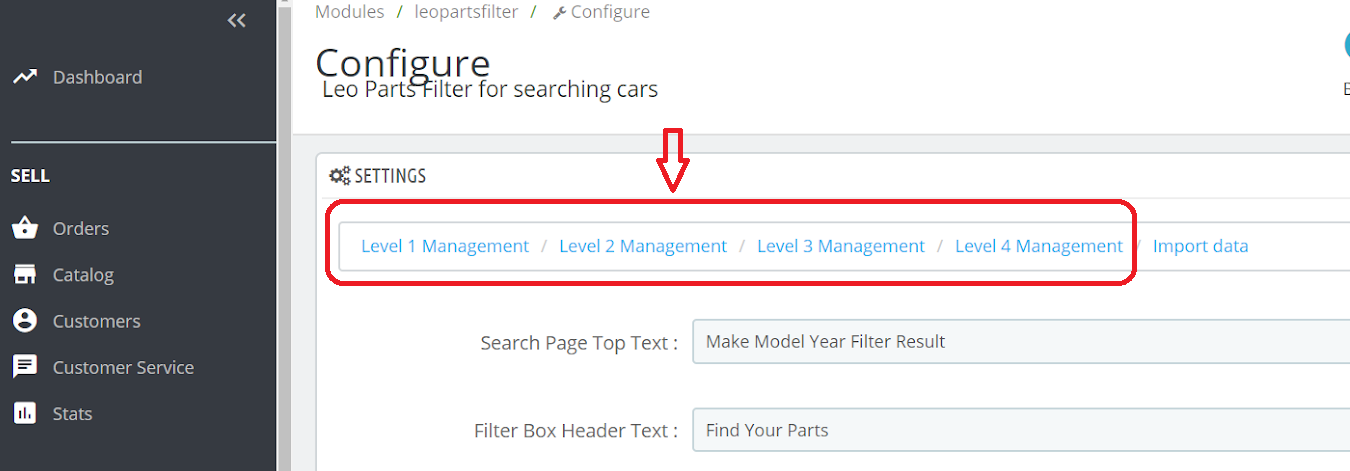
After finishing installation, refer to this blog How To Install Leo Parts Filter Module if you need more detail, you go to Modules → Leo Parts Filter Configuration to start configuration process.
Step 1: Configure Text Display
When going to Leo Parts Filter Configuration, you will find Setting section. You delete default text and fill your own respectively:
- Filter box header: The heading of filter box
- Level 1 dropdown value: Searching field name level 1
- Level 2 dropdown value: Searching field name level 2
- Level 3 dropdown value: Searching field name level 3
- Level 4 dropdown value: Searching field name level 4
Step 2: Create Searching Database
This module allows buyers to search based on available searching fields. By that, in this step you need to create the searching database (attribute list) for each level/field. Leo Parts Filter supports 2 methods to inputting data: manual and import excel file.
- Input data manually: You must input data for each level respectively.
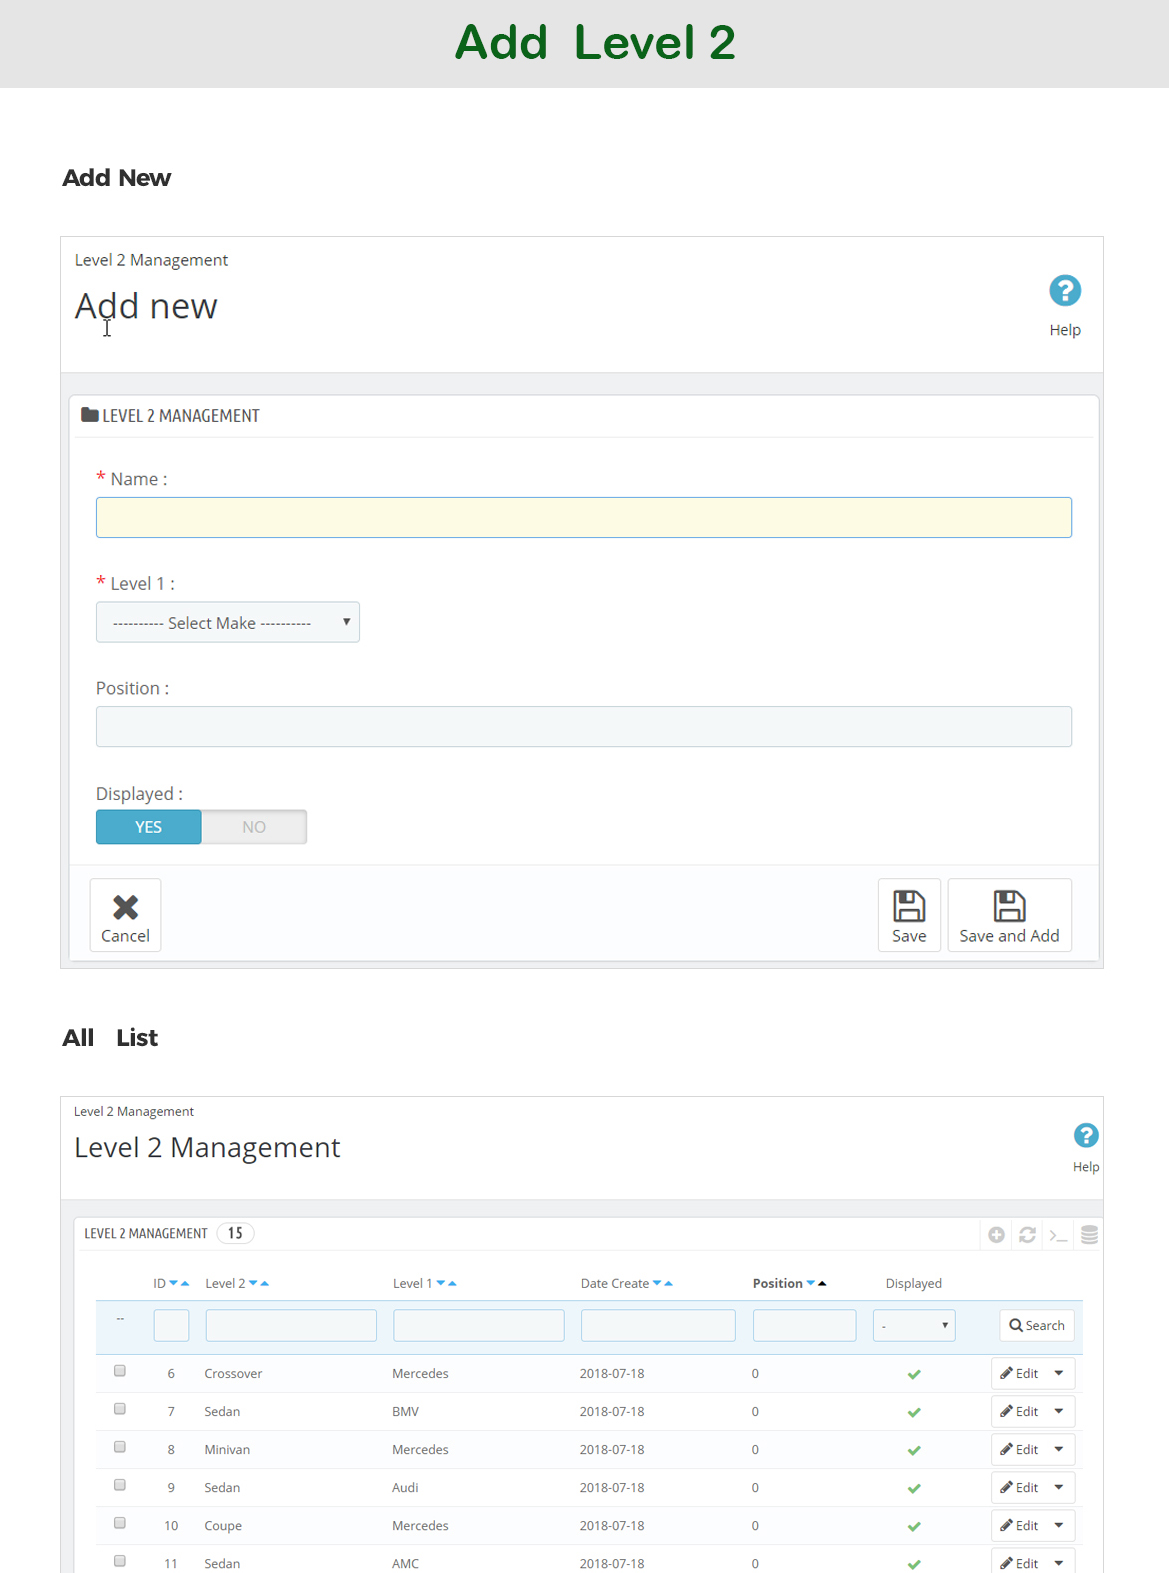
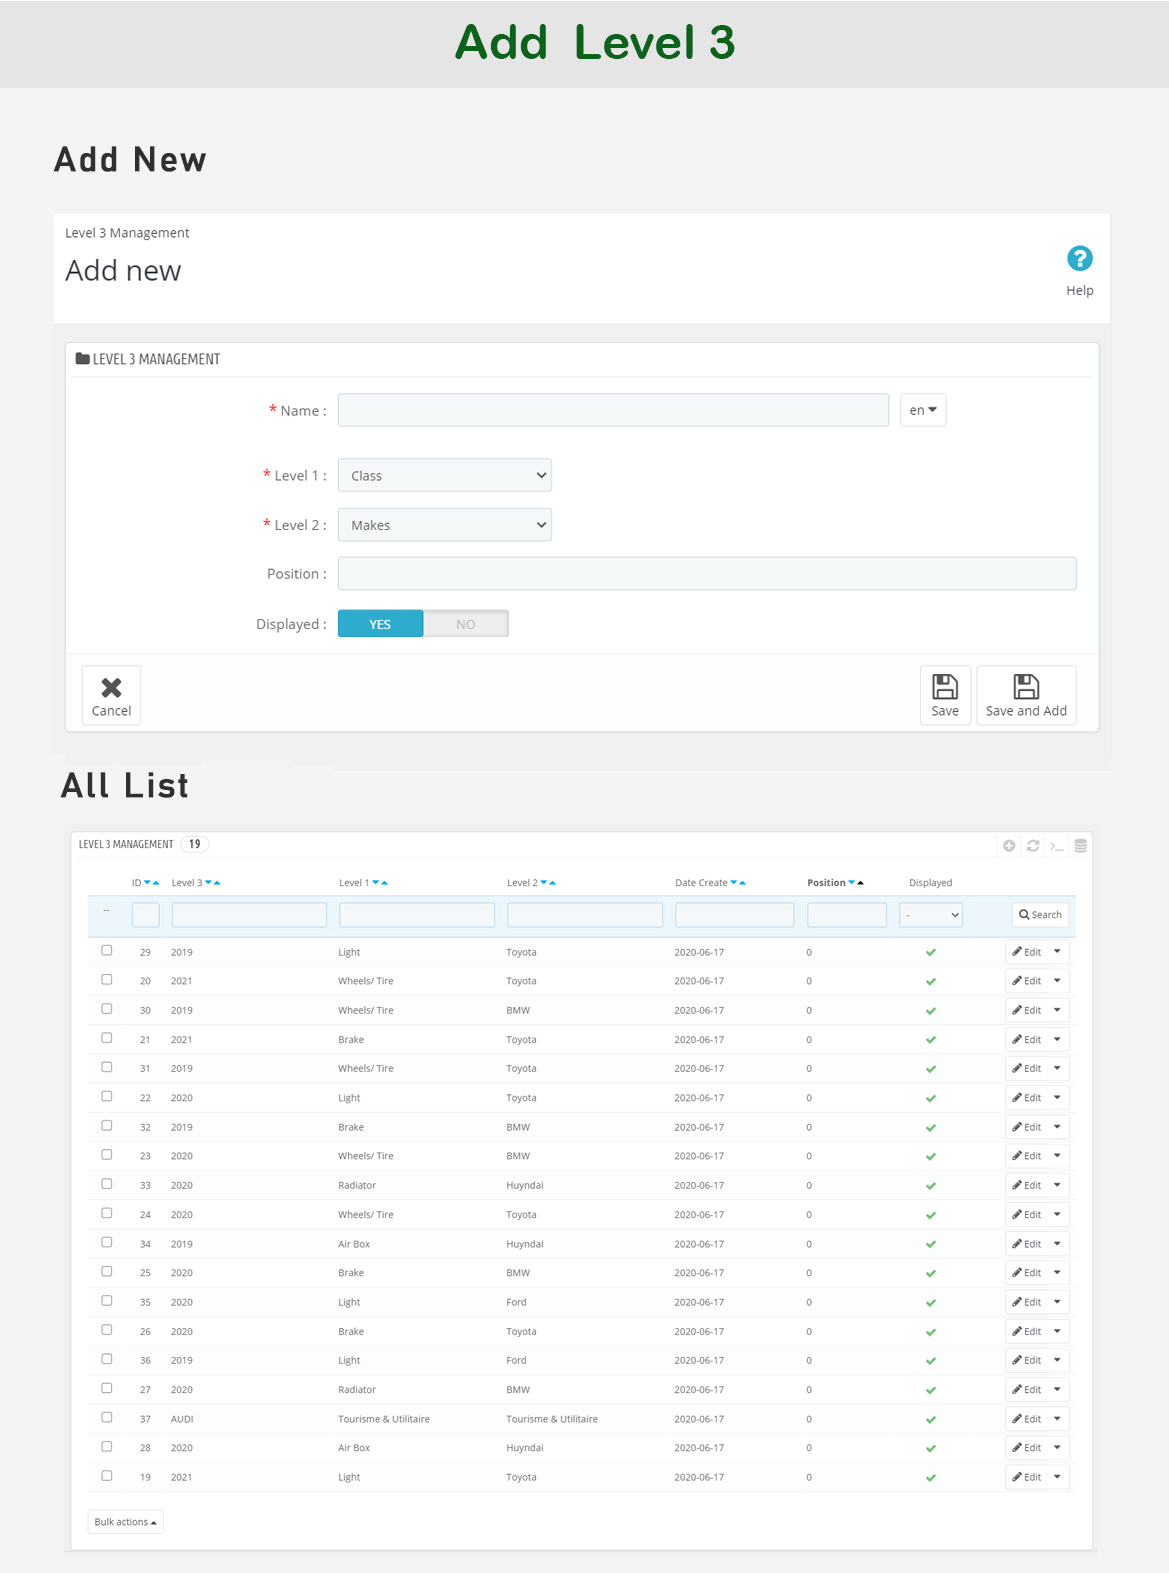
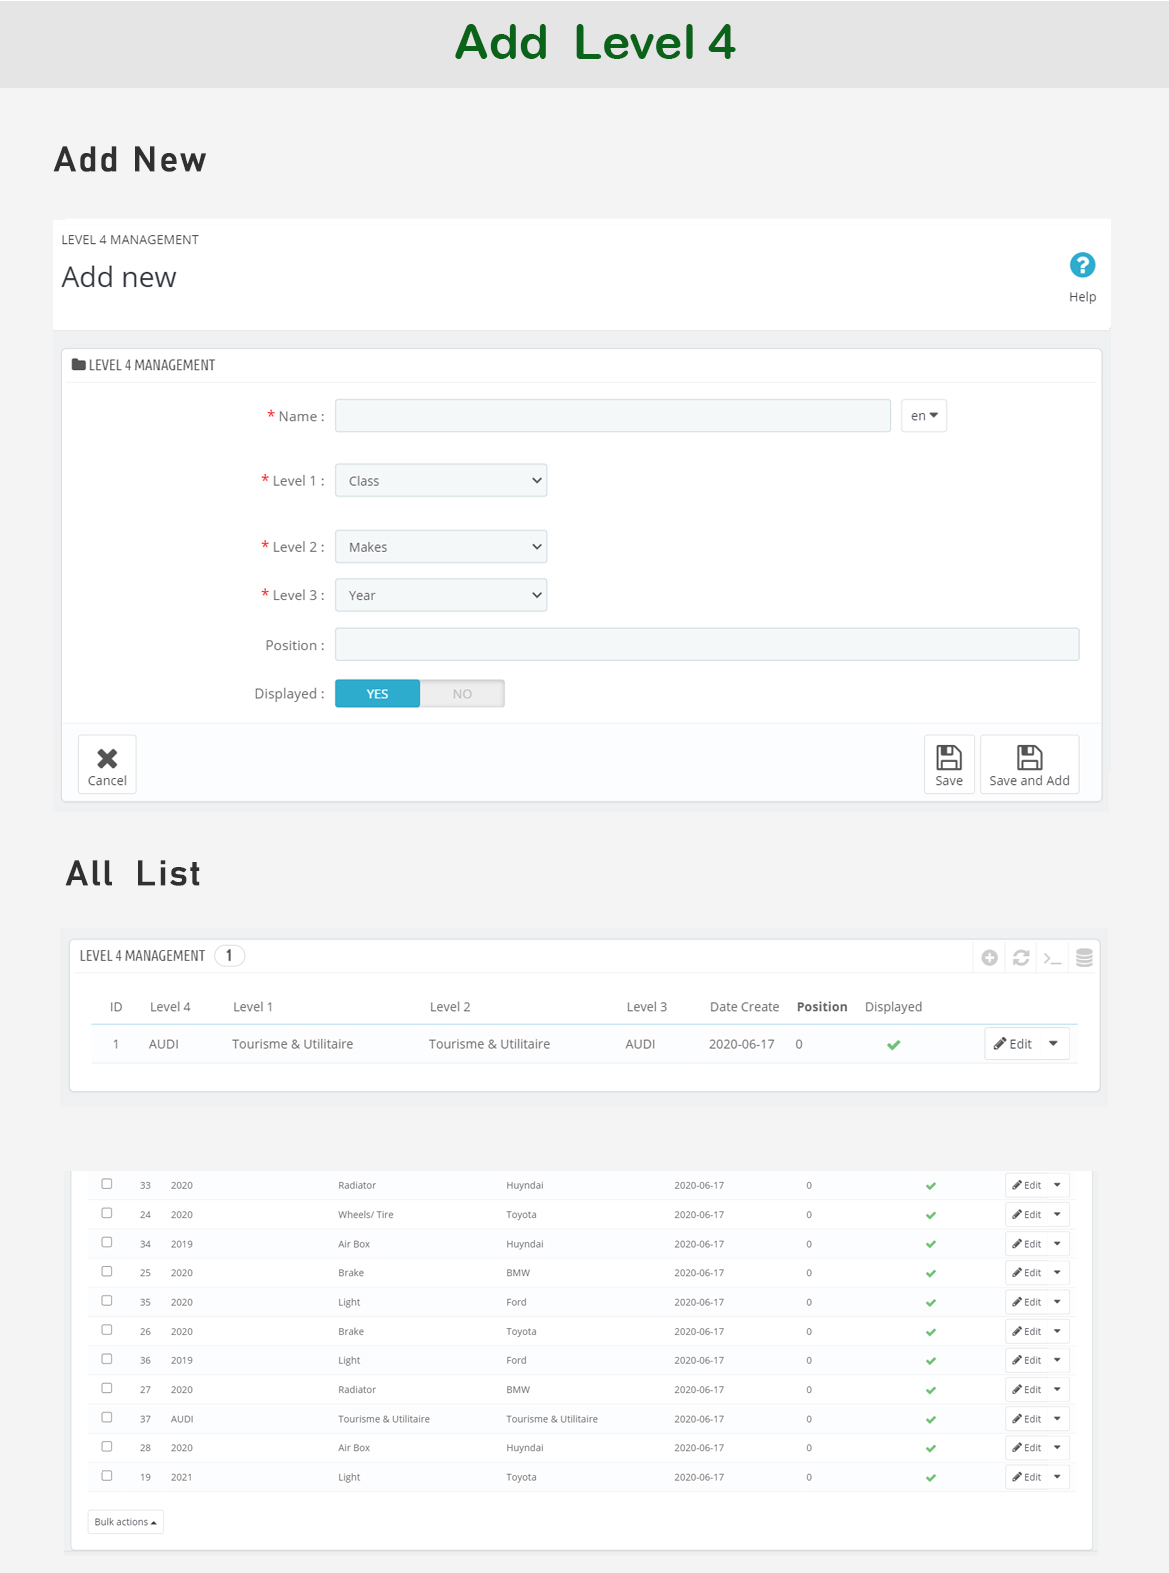
Firstly, for level 1, you select Level 1 Management → Add New. You fill name, position of attribute and click Save. To add new attribute for level 1 field, you repeat this action. You can check the attribute list showed below input section.
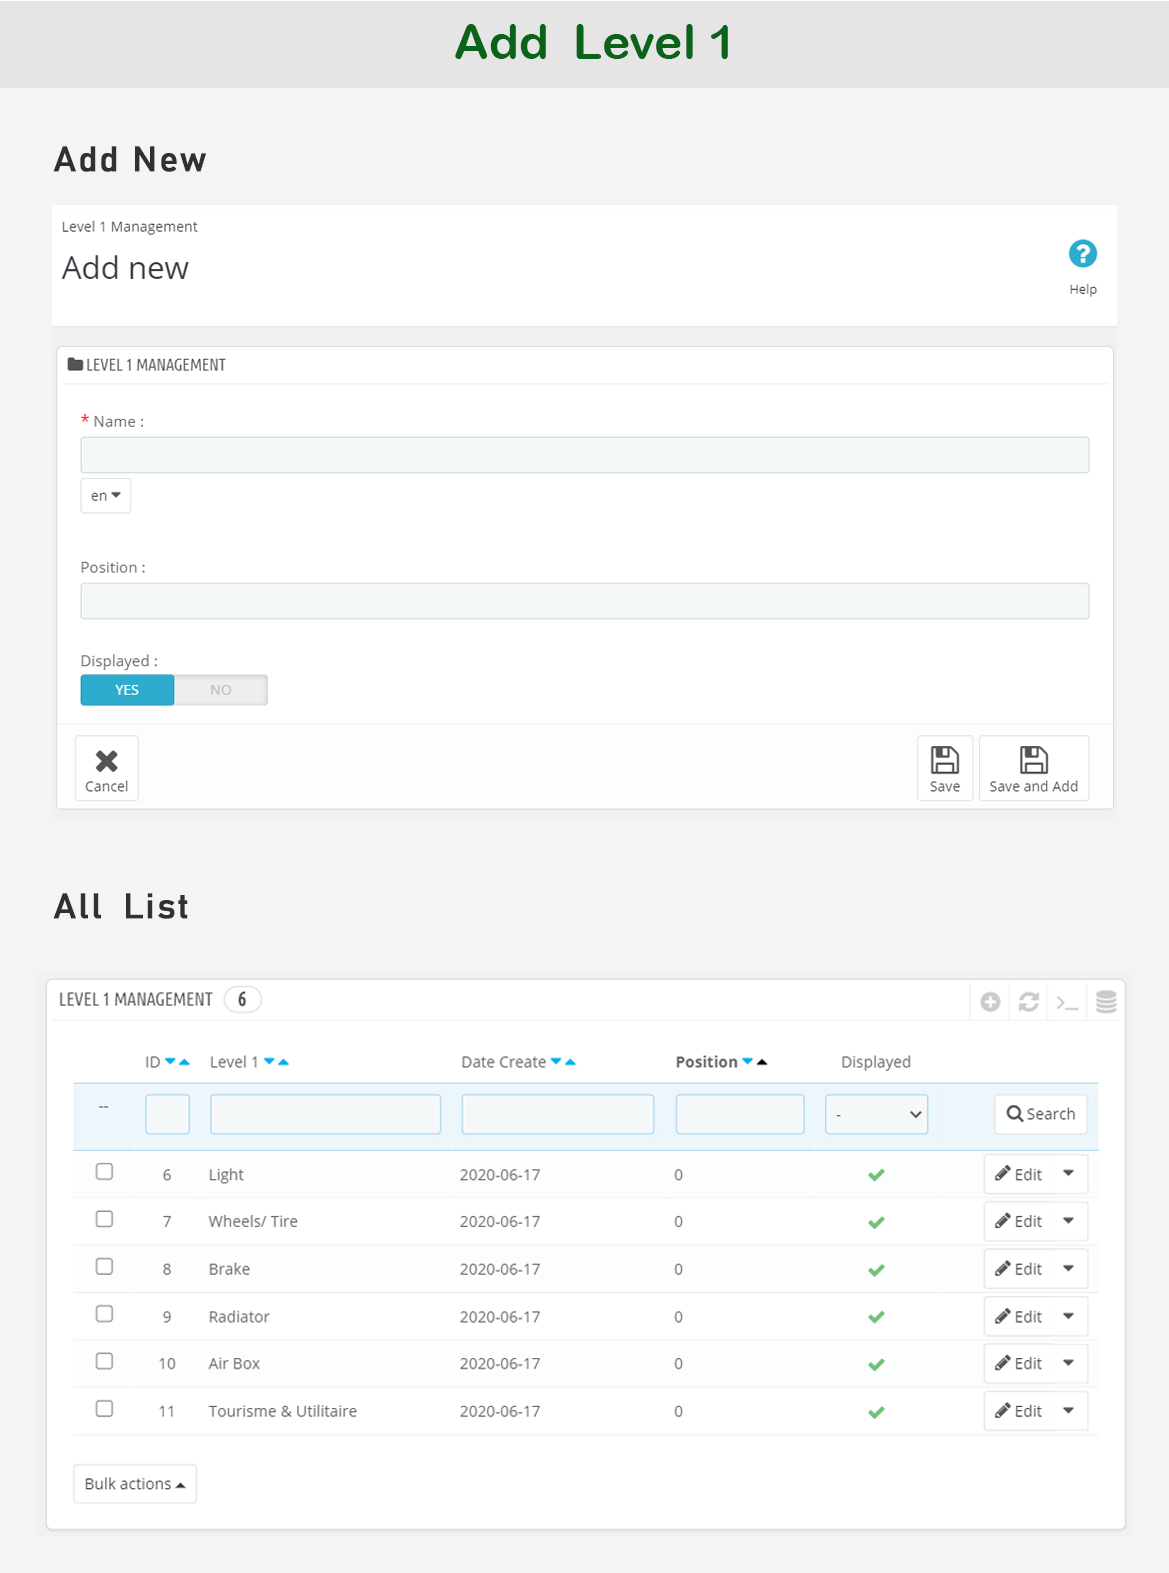
You do similarly for Level 2, 3 and 4 respectively.
- Input data by Excel file (.xls file)
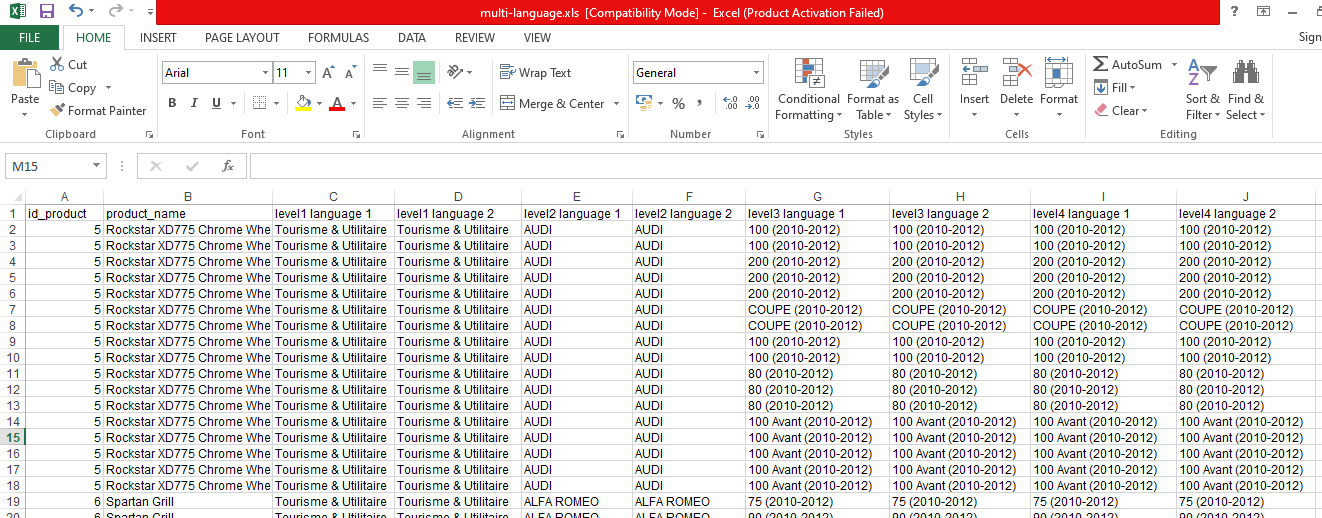
Instead of inputting data for each level manually, you can prepare data on excel (support .xls file only), then all you need to do is importing that excel file into system.
→ Create excel data file for web with 1 language: Download sample
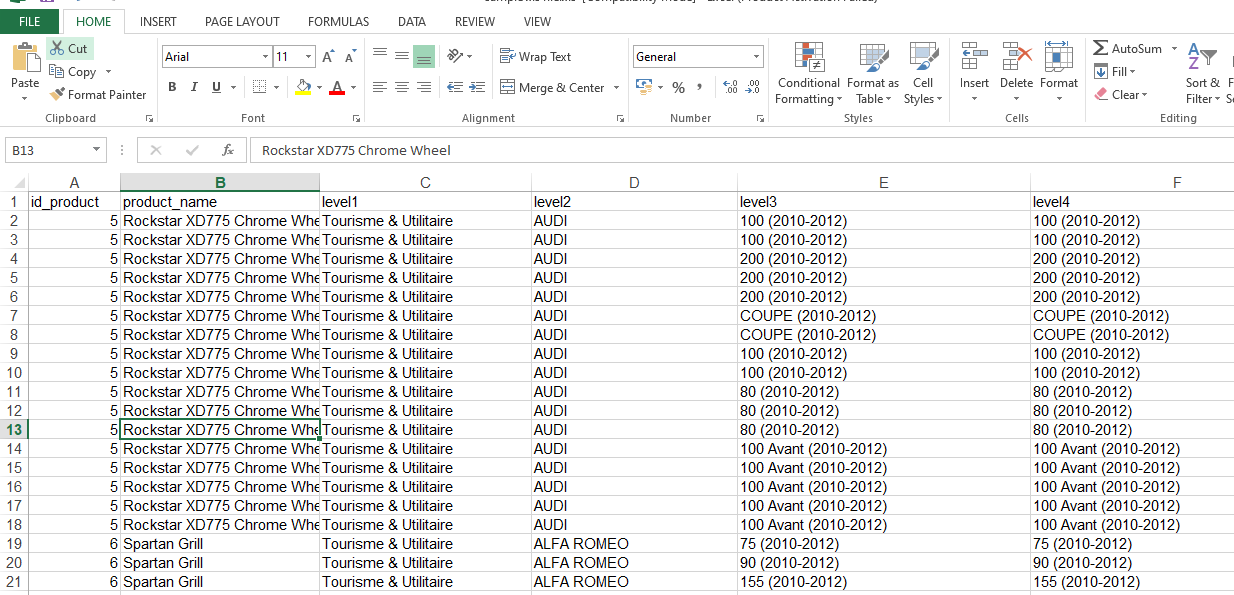
→ Create excel data file for web with multi language: Download Sample
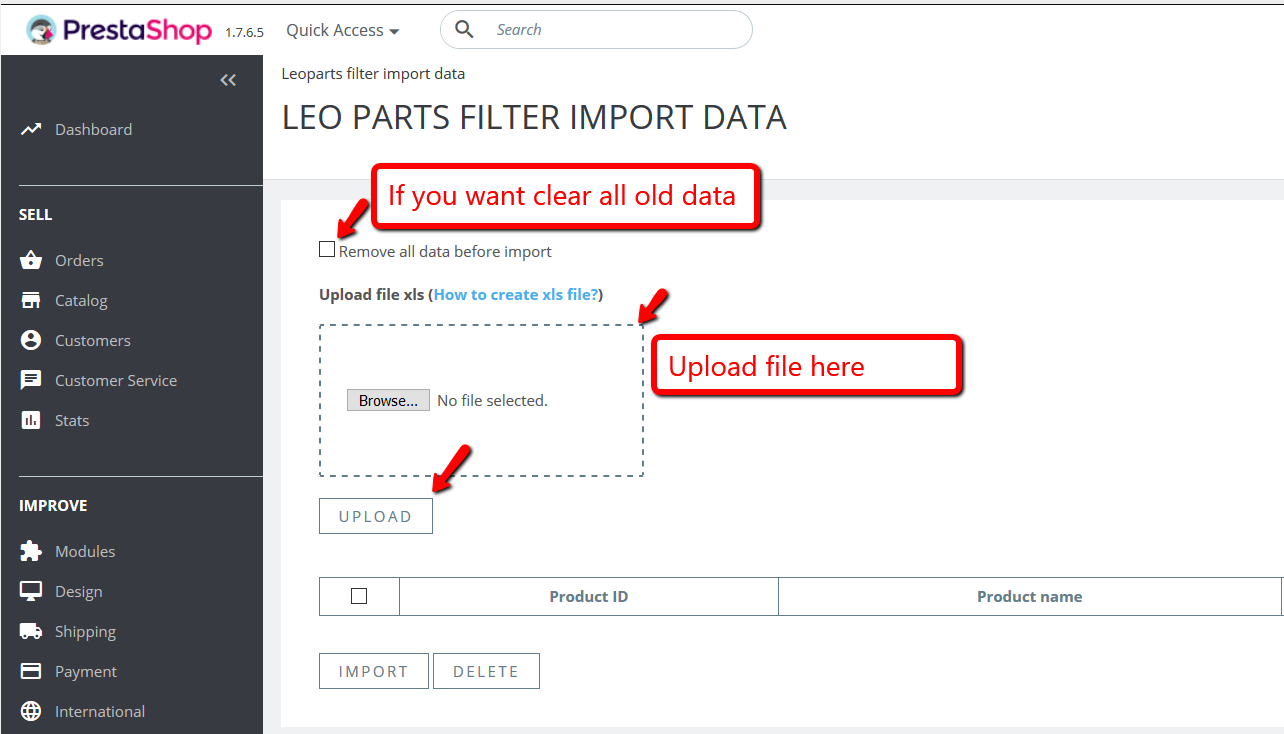
After completing excel file, you go to Modules → Leo Parts Filter Configuration → Import data. You select the prepared file and then click Import.
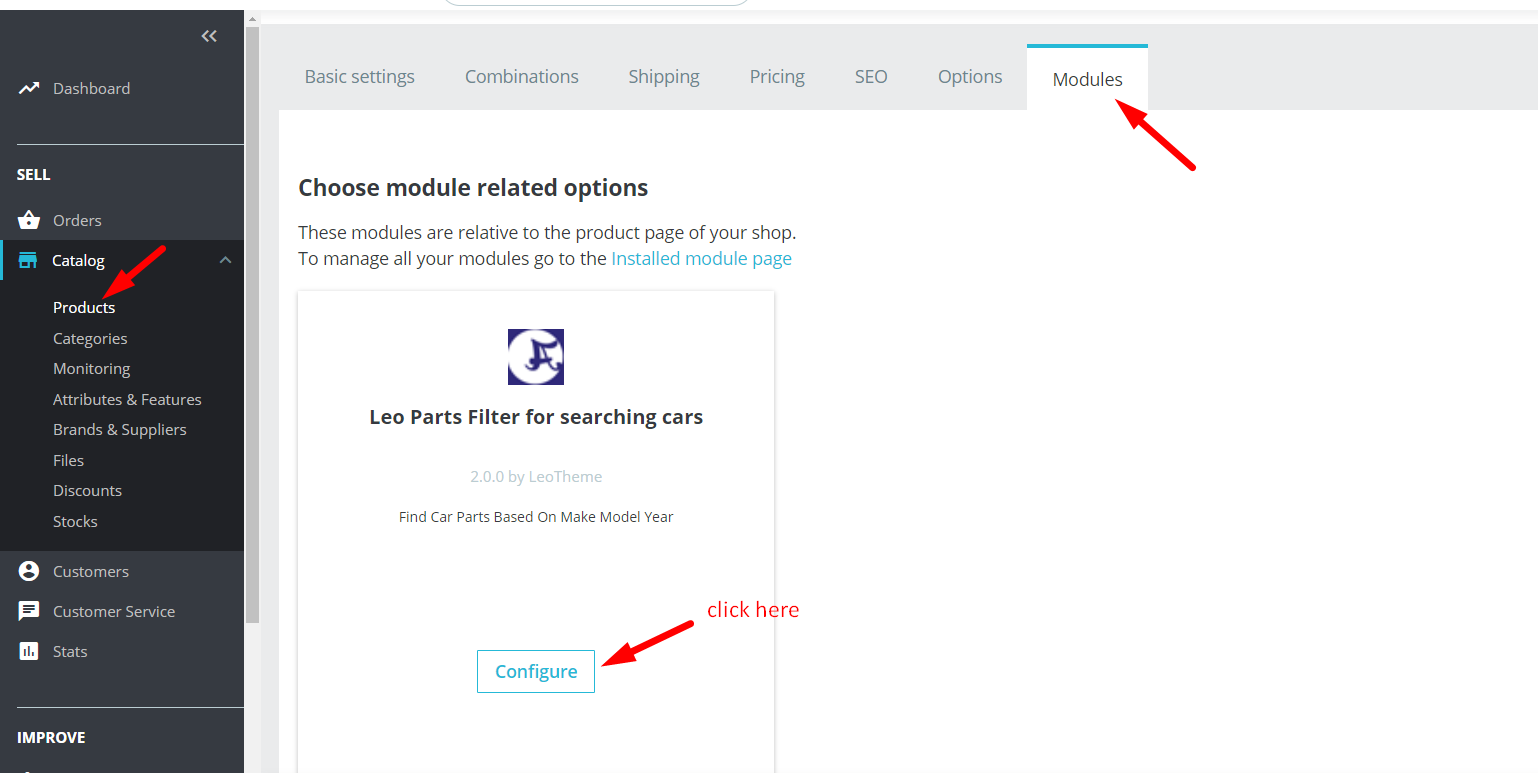
Step 3: Assign Filter For Each Product
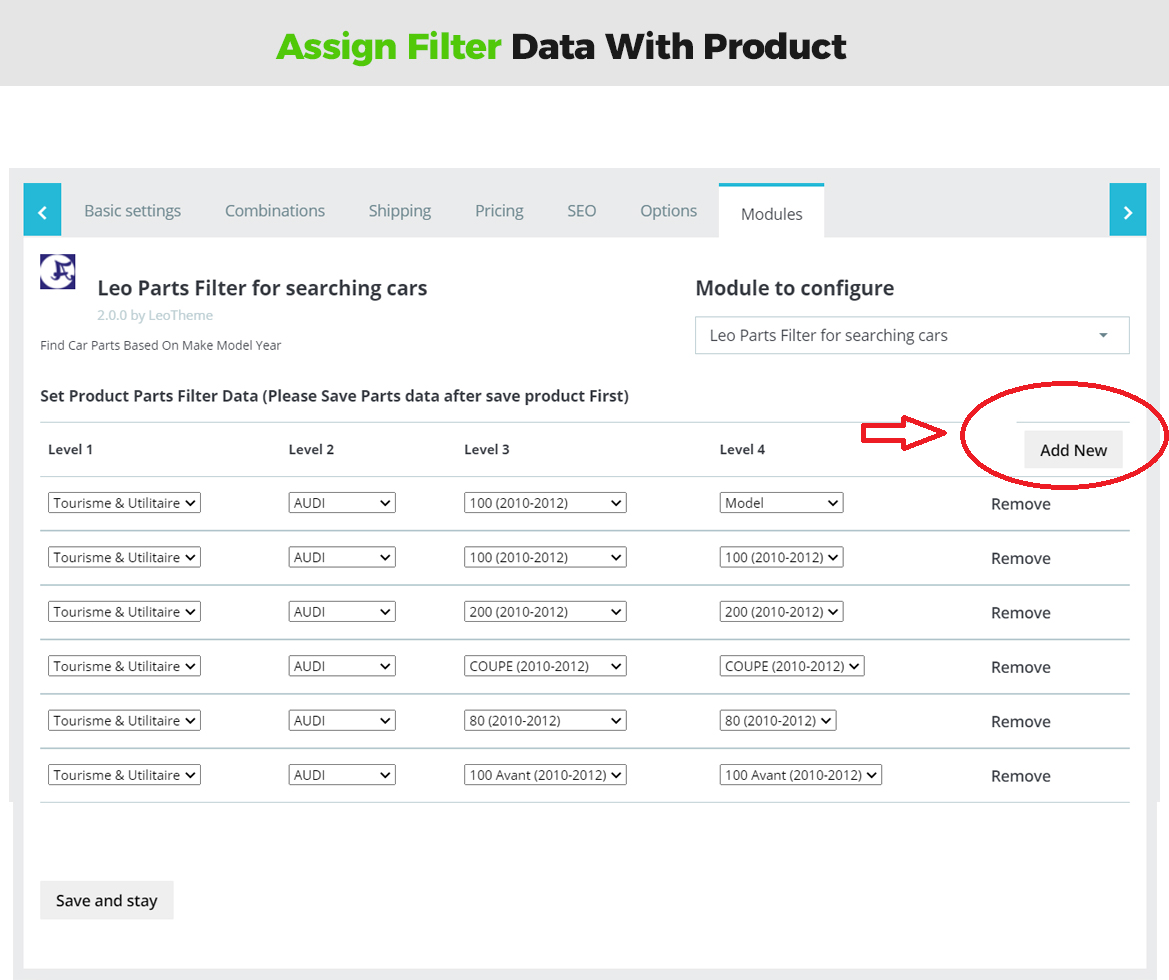
In this final step, we need to create a connection among products and data we already input. You go to configuration of each product, select Modules tab.
Next, you select suitable attributes for that product, click Add New to assign more attributes. Finally, you click Save And Stay to finnish.
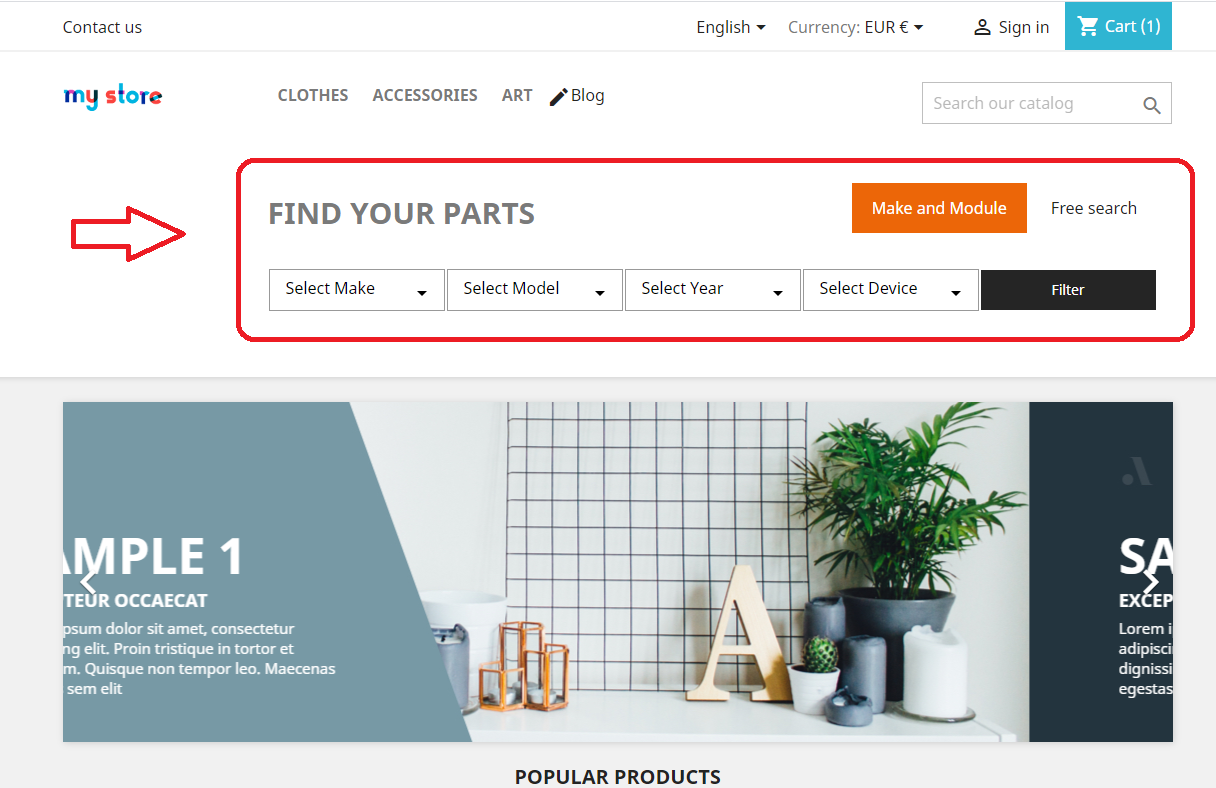
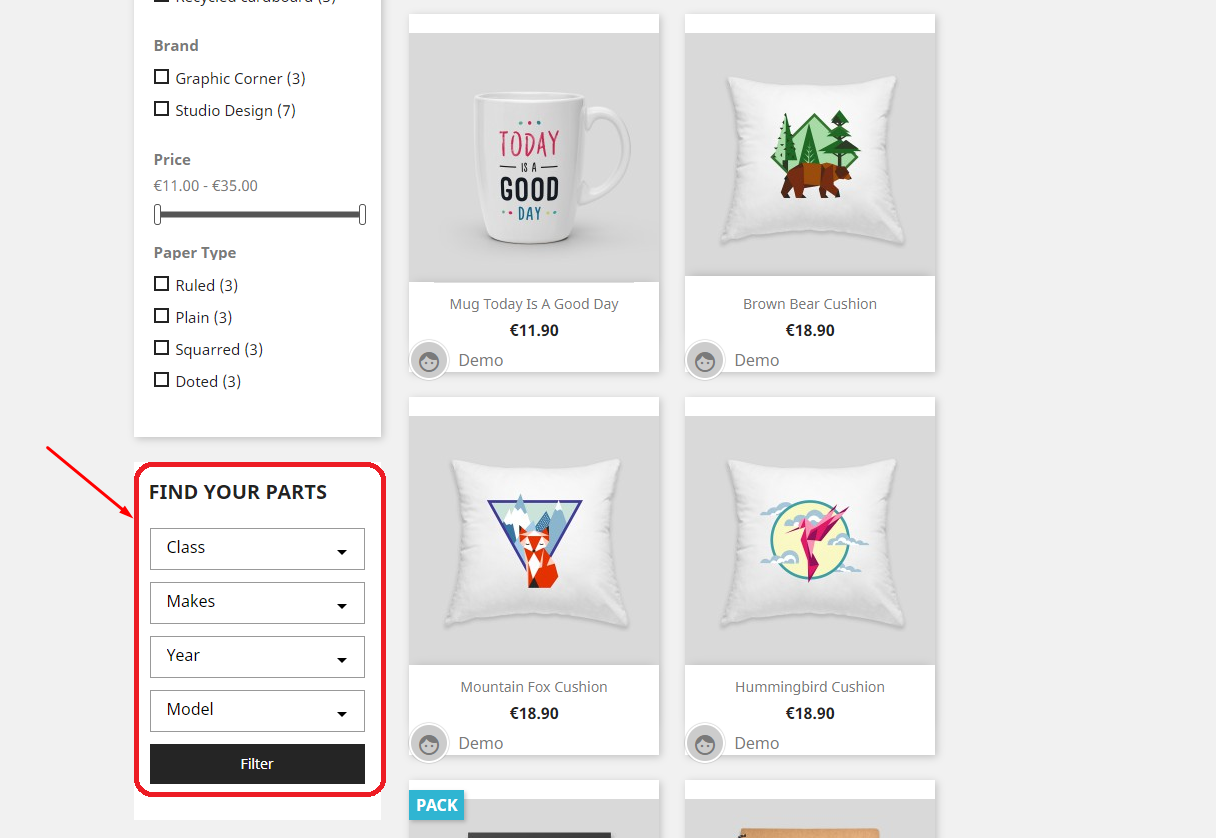
Front End Display
There are 2 default display hook: Display Top and Display Left Column:
- Display top:
- Display Left Column:
You can add more custom display by adding custom hook to tpl file {hook h=’displayFilter’}. So you can now enjoy full function of this module.
Hopefully, this blog is helpful for you. Wish you success!
Related Posts:
Release PrestaShop 1.7.7.0 Beta
How to install Leo Free Shipping Module
Best PrestaShop Themes 1.7.6 | The Best Improvement for Themes | Leotheme
30+ Top Best PrestaShop Premium Themes ( 1.6 & 1.7) 2019 – Leotheme
Top 10+ Best Watches PrestaShop Themes for Online Store in 2019
10+ Best PrestaShop Themes Restaurant for Food & Beverage Websites 2019 – Leotheme
Best 20+ Awesome Best PrestaShop 1.7 Themes 2019 for Ecommerce & Business
Top 5+ Best Game Prestashop Themes| Free & Premium themes 2019
10+ Top Best Kitchen Prestashop Themes for Kitchen Tools and Decor Online Store 2019
50+ Top Best Selling PrestaShop Themes – Ease to Use & High-quality
50+ Best PrestaShop Business PrestaShop Theme | Super Fast & Ease to Use
Top 20+ Best Prestashop themes for Women Online Store