In this blog, I will present to you the Simple and Quick Steps to Install Leo Parts Filter Prestashop Module from Leotheme
In order to build a Car/Parts Website, you have to prepare:
+ Install PrestaShop Platform
+ Install Leo Parts Filter Module
Now let get start!
- Purchase Leo Parts Filter Module on Leotheme
- Download Leo Parts Filter PrestaShop Module
- Upload Leo Parts Filter to Admin panel
1. Purchase Leo Parts Filter Prestashop Module on Leotheme
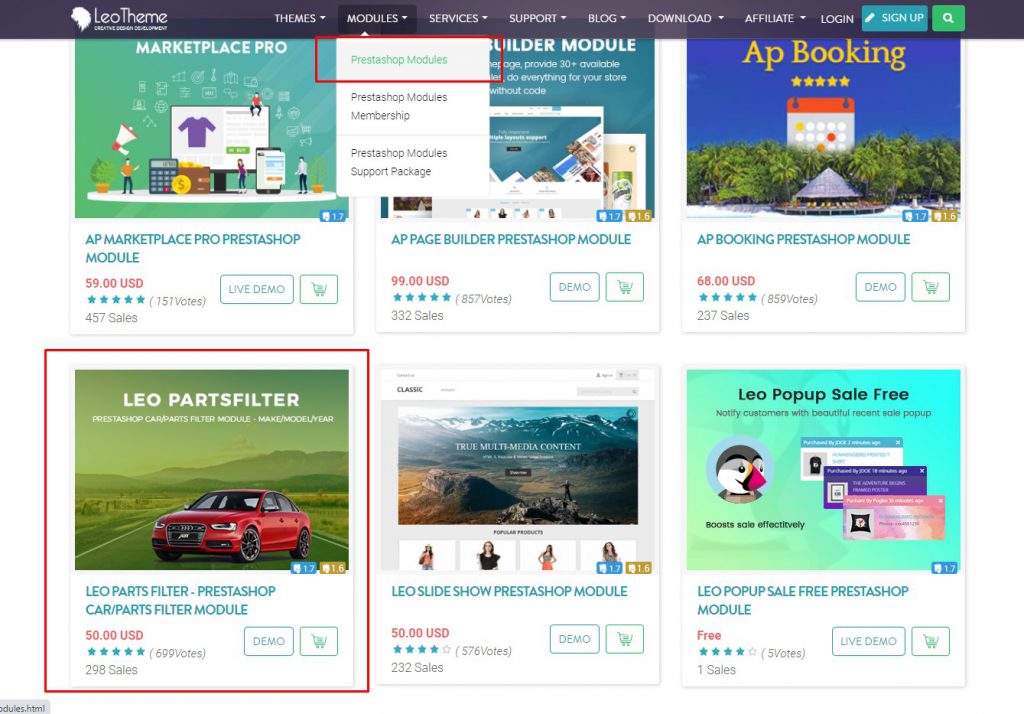
Leotheme.com is available with numerous powerful Prestashop Modules. Depending on your different aims of use, you can adapt them to your websites. To get the Leo Parts Filter Module, you go to leotheme.com -> Modules -> PrestaShop Modules -> Leo Parts Filter Prestashop Car/Parts Filter Module
2. Download Leo Parts Filter PrestaShop Module
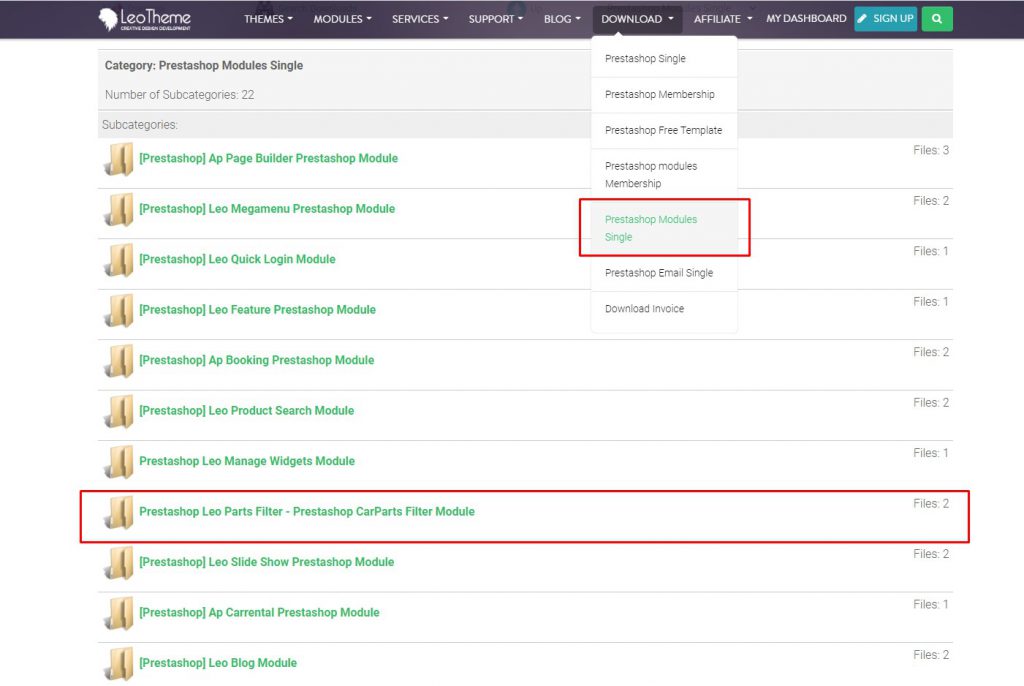
Download Leo Parts Filter PrestaShop Module:
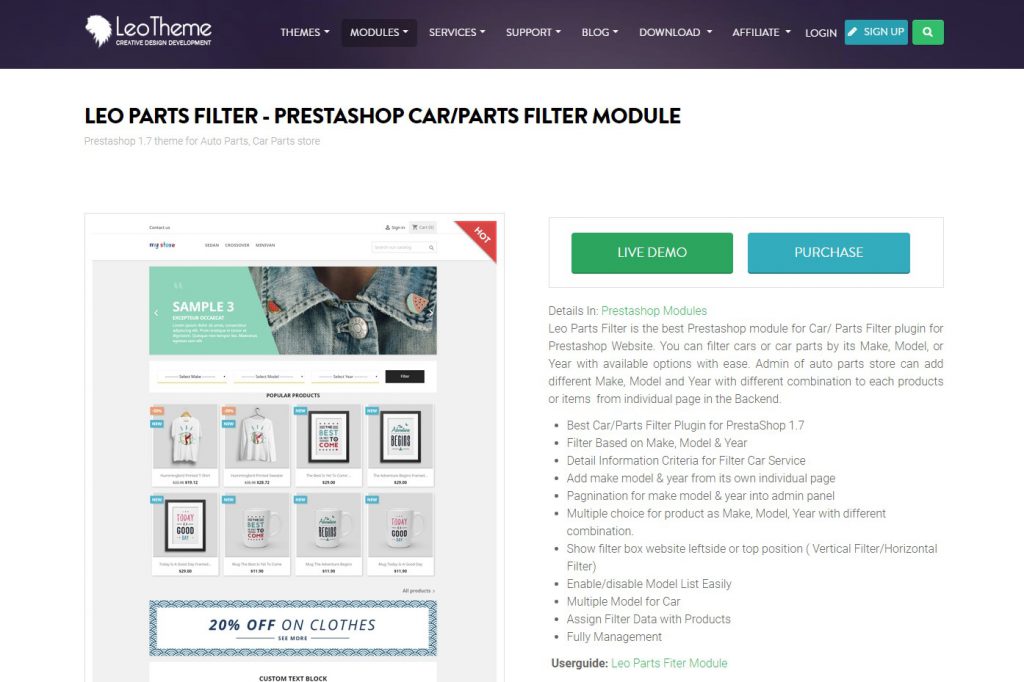
To download Leo Parts Filter Prestashop Module, you have to buy the module. Starting by clicking on the PURCHASE button and follow step by step. After you complete the purchase process, your account will be activated and you can access the DOWNLOAD section to download the module.
3. Upload & Install Leo Parts Filter Prestashop Module to admin:
Admin -> Modules -> Module Catalog
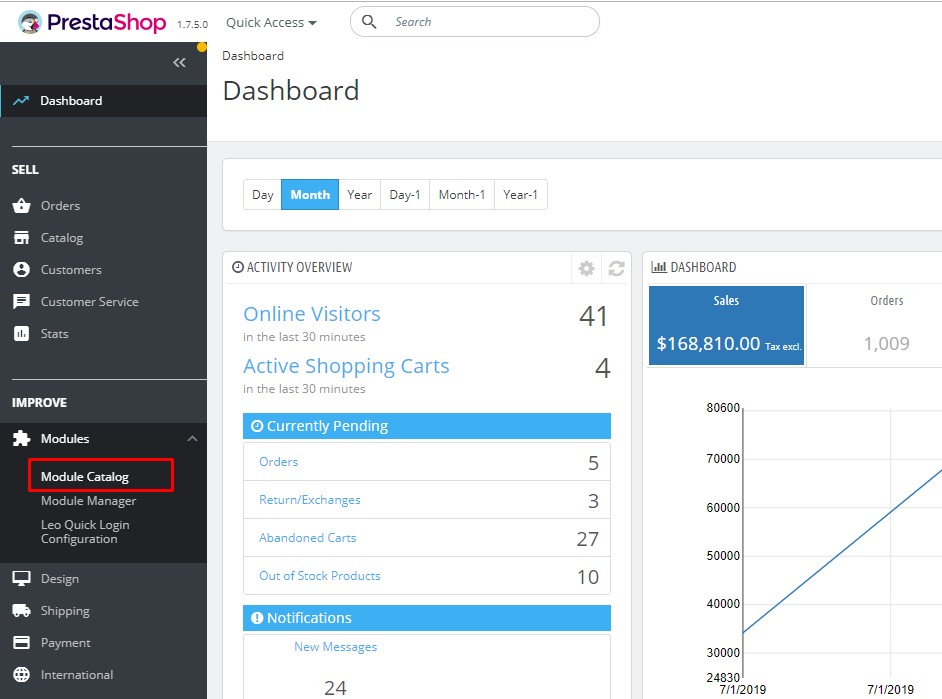
Install a module:
You can upload the module file by dragging & dropping to store or locating Leo Parts Filter Module on the computer.
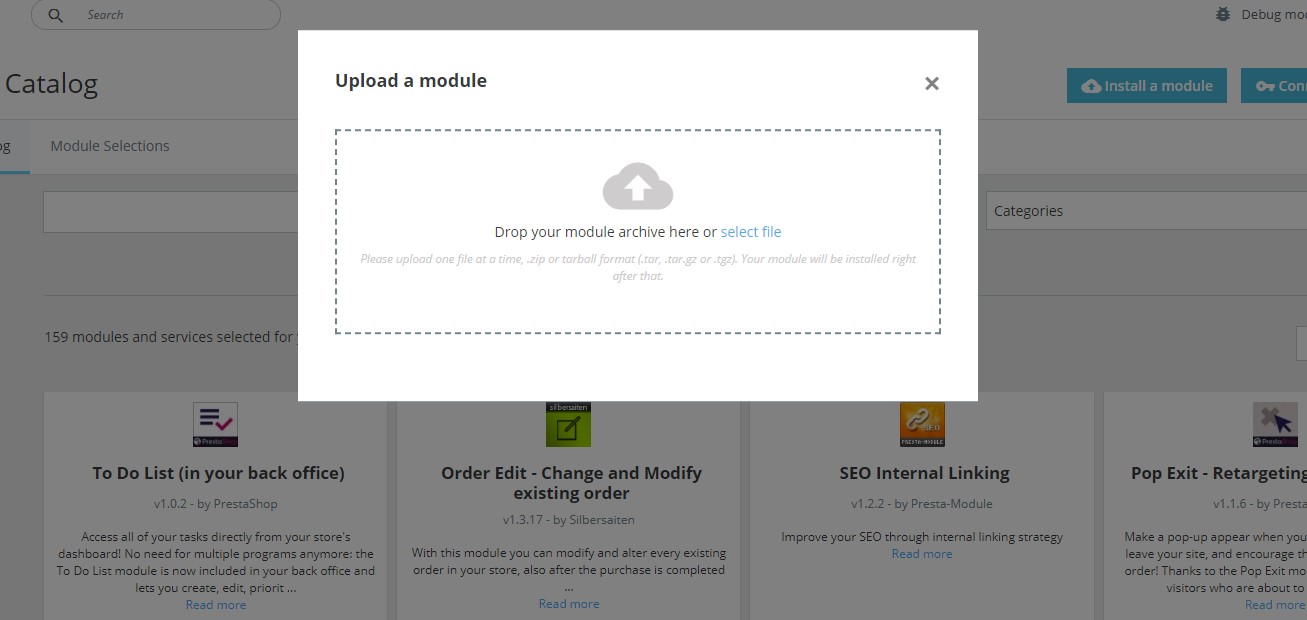
After uploading the file successfully, then you can start to config the module.
If you want to config Leo Parts Filter PrestaShop Module for your store, please visit more at the user guide: Userguide for Leo Parts Filter Prestashop Module
Wish you success with Leo Parts Filter Prestashop Module!
 Prestashop Themes and Module Blog PrestaShop News, Tutorials & Marketing Tips



One comment
Pingback: Leo Parts Filter Module || Configuration Instruction || By Leotheme - Prestashop Themes and Module Blog