This tutorial will guide you “How to Install PrestaShop 1.6 Theme to Prestashop Cloud Hosting”.
1. Login PrestaShop Dashboard:
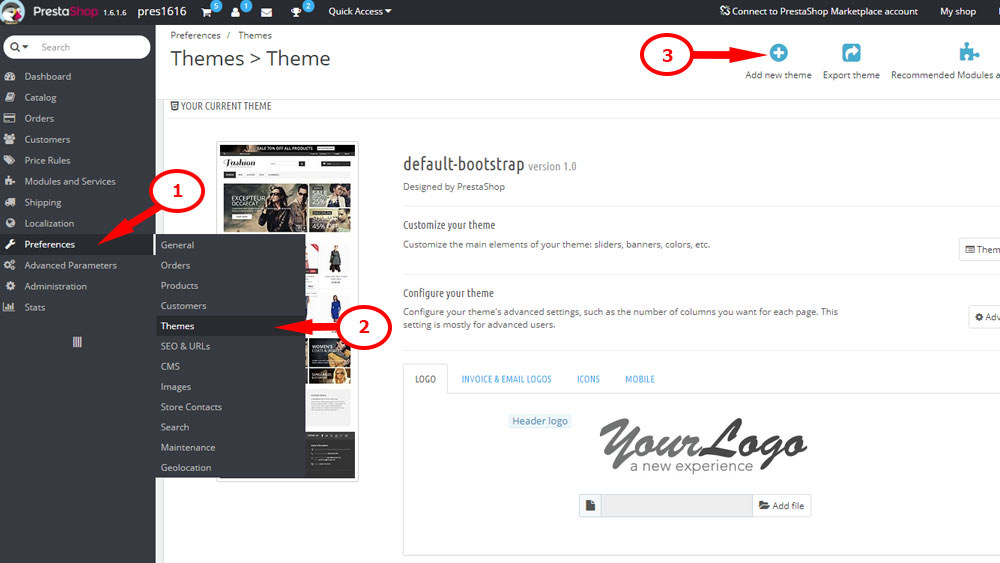
Navigate to Preferences, choose Themes
2. Import PrestaShop 1.6 Theme:
Click on Add new theme button
Click Next to enter your Prestashop Addon account information. If you bought the theme on Prestashop Addon store, your theme will be added automatically.
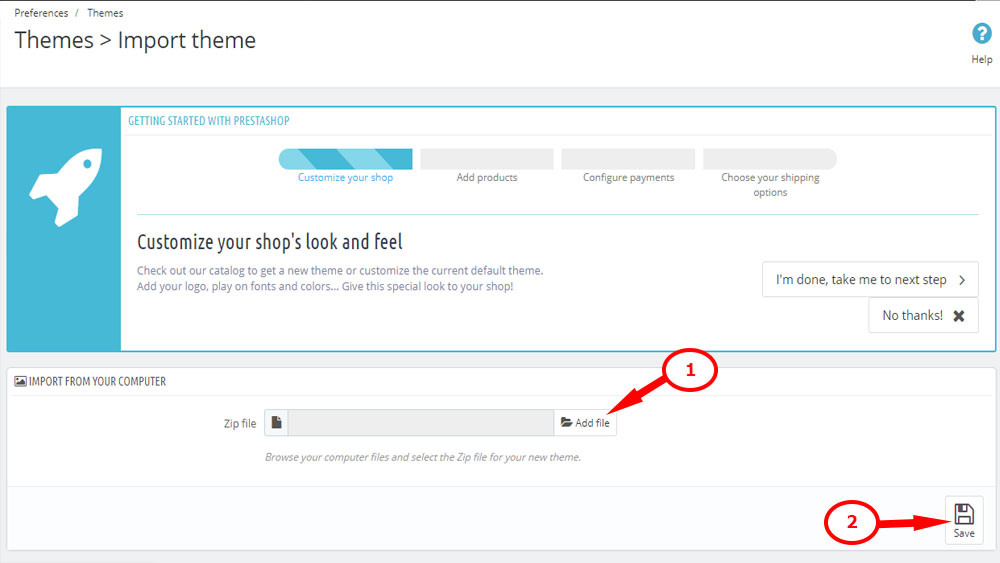
If you bought the theme on TemplateMonster, click Add new theme button again
Choose a zip file from theme/themeinstallator folder of your template then press “Save” to confirm uploading.
You may need to wait for second till the upload is completed.
The tool for uploading zip files from the computer only appears for Prestashop addons users.
When the theme is added successfully to the list of your themes, hover its thumbnail and click Use this theme button
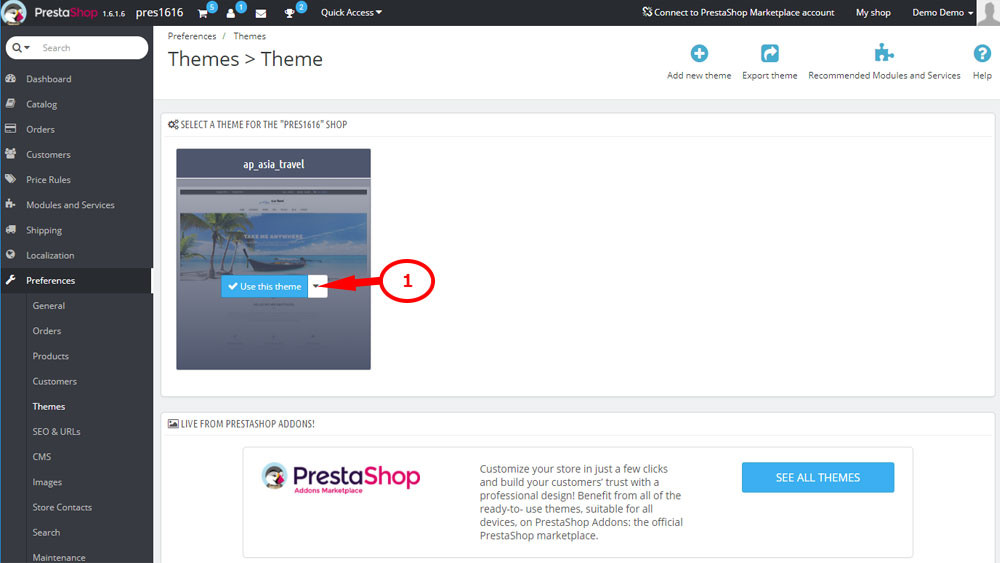
Confirm the modules to install by click on Save button.
If you want to make the theme look the same as the demo, go to Install sample date => Import tab. Drag and drop all file from theme/sample_date folder of your theme and click Continue install button. Wait until data importing completed.
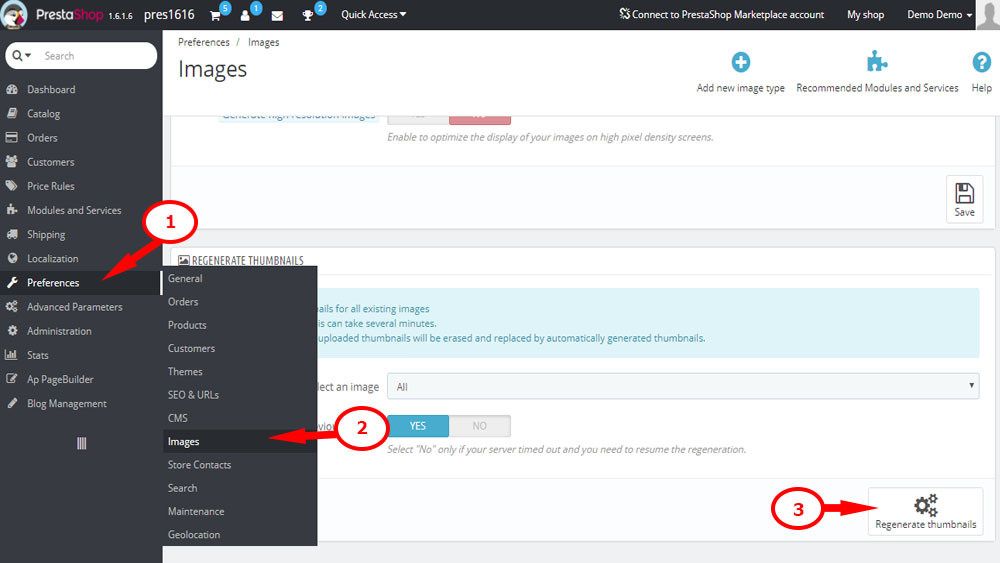
Go to Preferences => Images then click Regenerate thumbnails button
Enter your store frontend in the browser and check your store look
Now you know How to Install PrestaShop 1.6 Theme on PrestaShop Cloud Hosting Quickly. Hope this tutorial helps your installation more simply.
Related Post:
-
- PrestaShop 1.7.x: How to Install PrestaShop 1.7 Default Theme
- How to Install PrestaShop 1.7 Default on Server | PrestaShop 1.7 Tutorial
- PrestaShop 1.7 Tutorial: How to Add New Category PrestaShop 1.7
- Quickly Update PrestaShop Theme 1.7 for Product Page & Category Profile
- New Theme Folder’s Structure of PrestaShop 1.7
- Prestashop 1.7 Is Released | PrestaShop 1.7 Features You Should to Know
- 10+ Secret Prestashop 1.7 SEO Tips to Get Higher Rank for Store
 Prestashop Themes and Module Blog PrestaShop News, Tutorials & Marketing Tips

