
On the market, how can you make your shop special, outstanding & more impressive among the numerous different vendors at the first sight? Being one of the best impression of customer is your profile. The short place to advertising your shop information & engage more potential customers to your website. And it is the power place if your shop has an outstanding profile.
However, to create a perfect profile in PrestaShop marketplace with multi vendor competition. In term of this blog, we’ll guide you “How to Manage Vendor Marketplace PrestaShop effectively”.
To add vendor information, you have 2 way to create vendor profile by using Ap Marketplace PrestaShop 1.7. With this module, you can create vendor account & add information easily. But, the number of vendor account is limited in FREE version of Ap Marketplace. If you want to create unlimited vendor account, you can refer at Pro version of Ap Marketplace. By installing module, you can manage seller account at at seller’s dashboard & admin panel.
So with this blog, you will get:
- Create New Vendor PrestaShop 1.7
- Manage Vendor Marketplace PrestaShop
- Edit/delete Vendor Profile PrestaShop 1.7
I. Create New Vendors PrestaShop 1.7
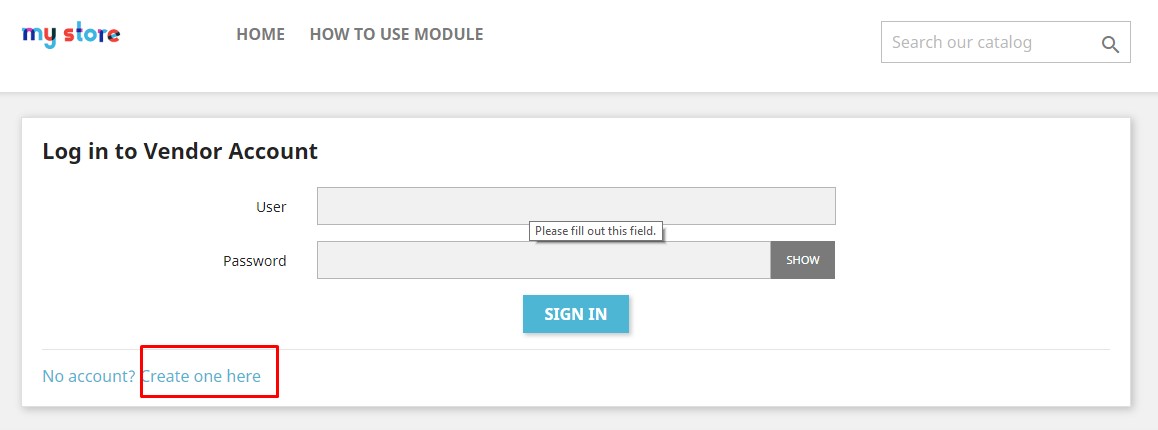
1. Create New Vendor PrestaShop 1.7 Frontend
At the front-end of PrestaShop Marketplace, you can create New Vendor in PrestaShop Store by click “Create One here”:
Add information for vendor account:
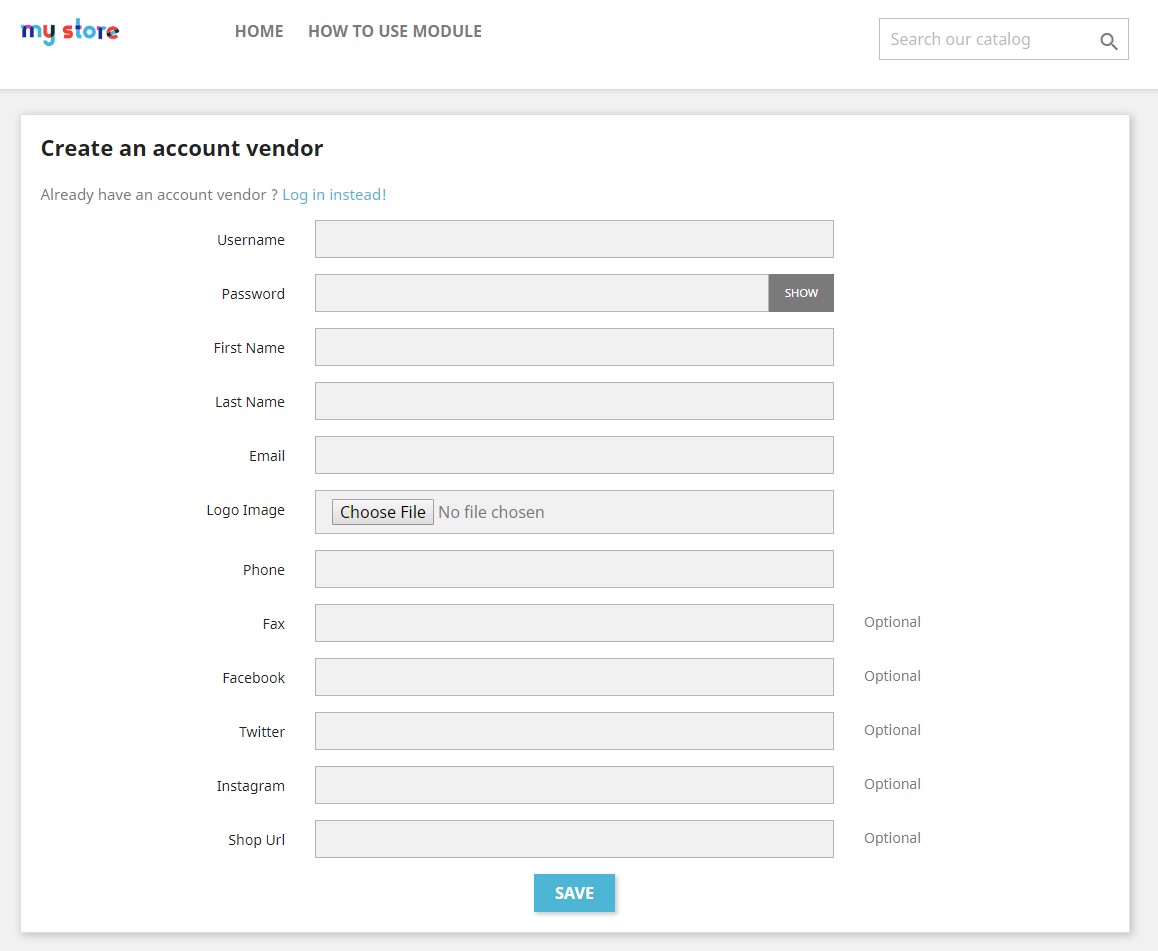
Username: Name of shop when you login on the market.
Password: Password of shop.
First Name:
Last name:
Email: Email address for your shop. If you forgot password, you can reset the password for your account.
Logo Image: Shop image to increase the brand of shop and recognize your shop among huge number of vendors.
Phone: Phone number of shop to let customers contact quickly.
Fax:
Facebook: Shop page on facebook
Twitter: twitter account of shop
Instagram:
Shop URL: Link URL shop
Then “Save” for “Vendor Account”
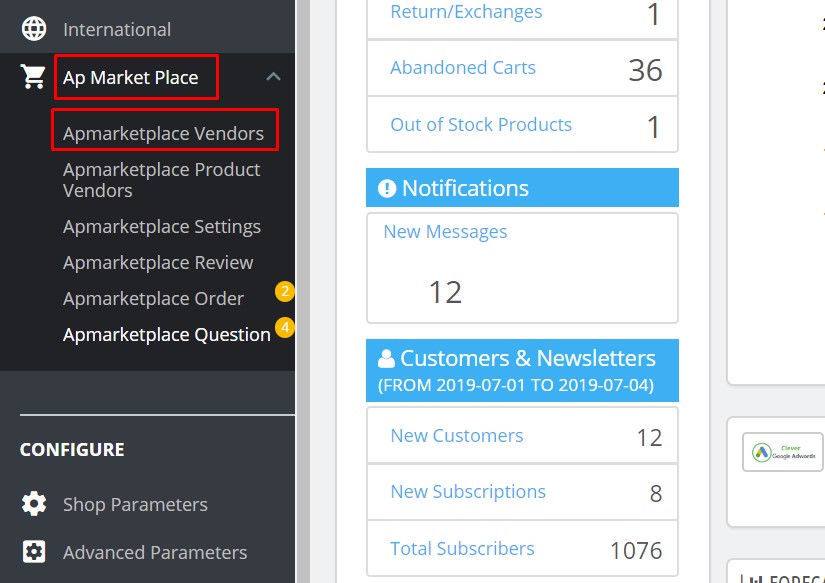
2. Create Vendor Account in PrestaShop At Backoffice
Go to Admin Panel -> Apmarketplace -> Marketplace Vendors:
Click at the plus “+” to “Add New Vendor Account”
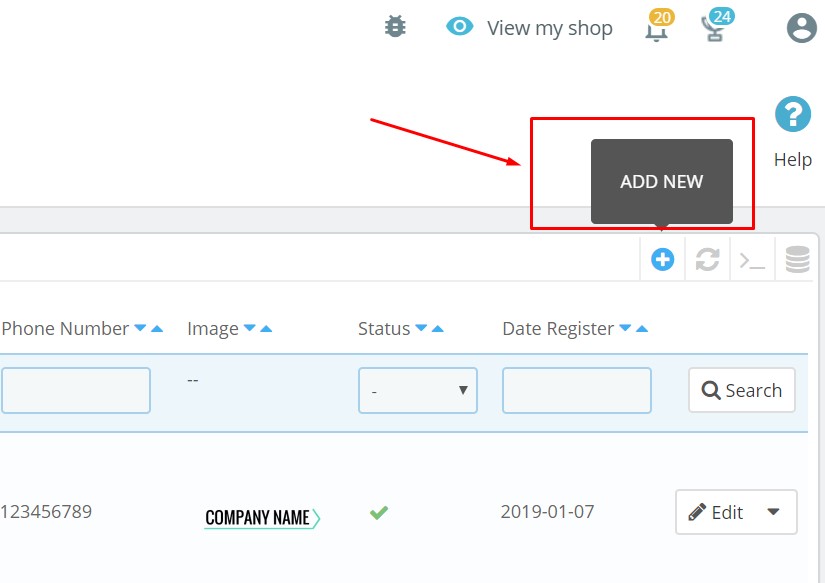
And fill vendor information:
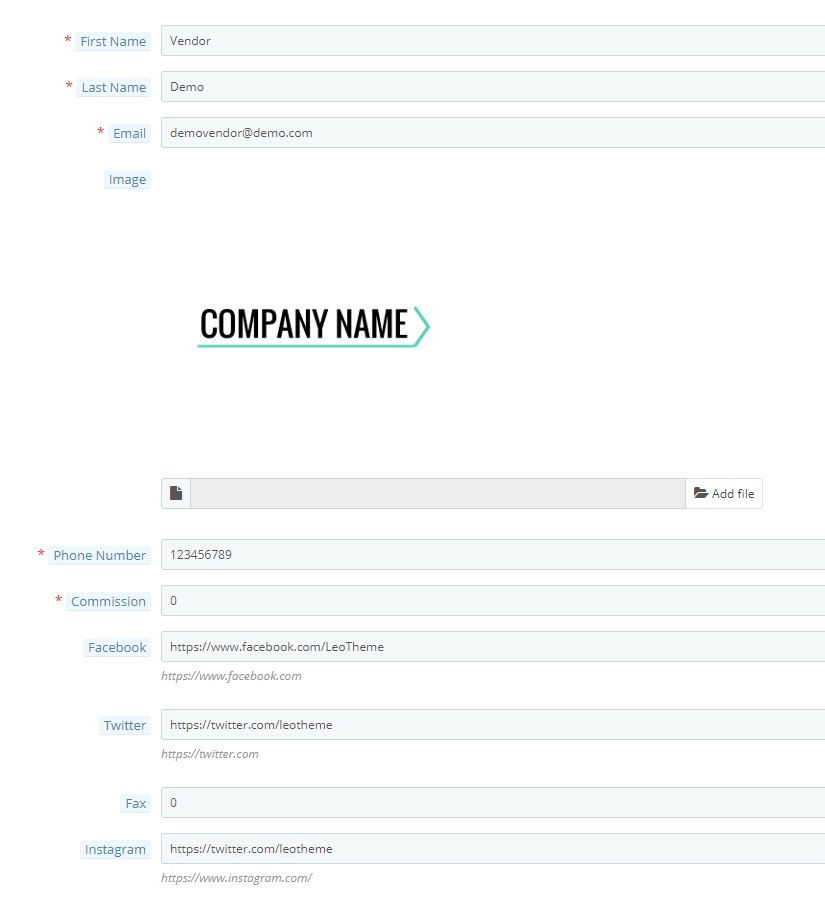
First Name:
Last Name:
Email:
Image:
Phone Number:
Commission:
Facebook:
Twitter:
Fax:
Instagram:
Shop URL:
Password:
Active Vendors:
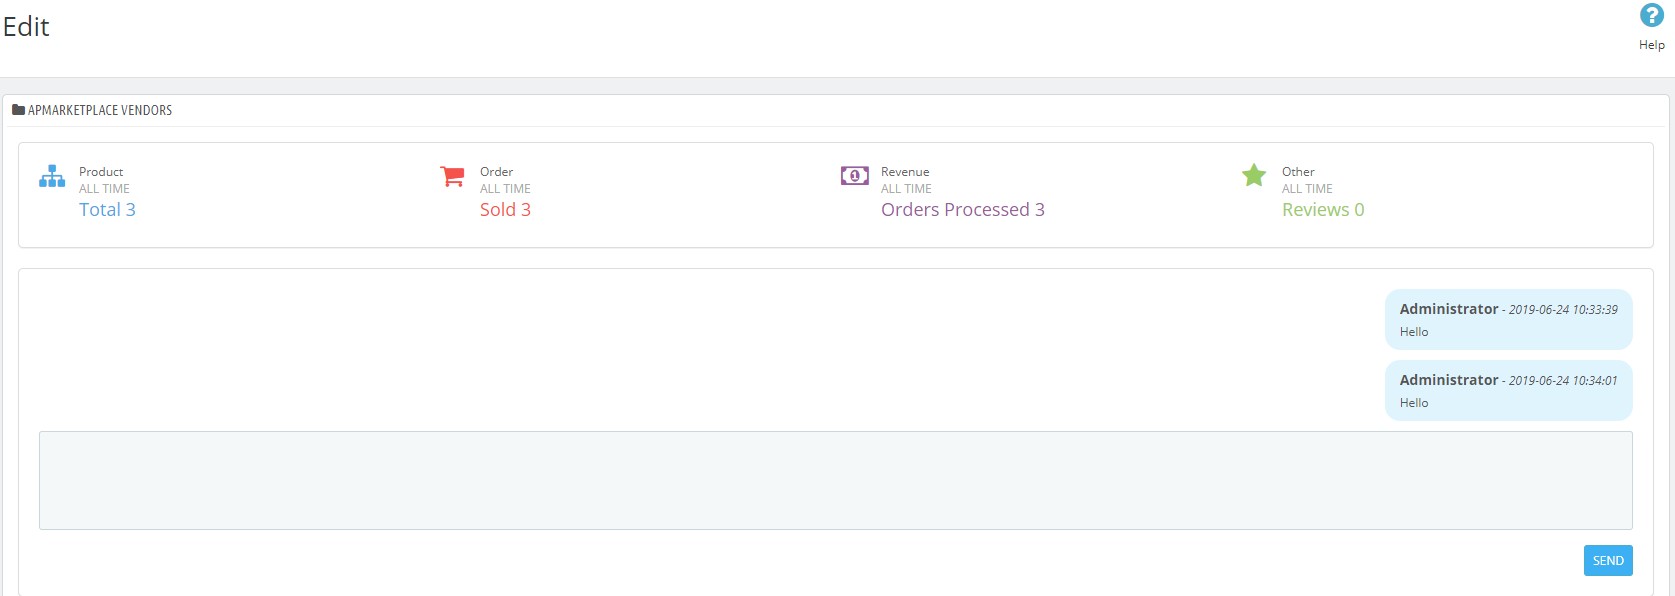
Moreover, at the vendor admin, admin can check & manage chat with vendor.
Then “Save & Stay” or “Save” the changes.
II. Manage Vendor Marketplace PrestaShop:
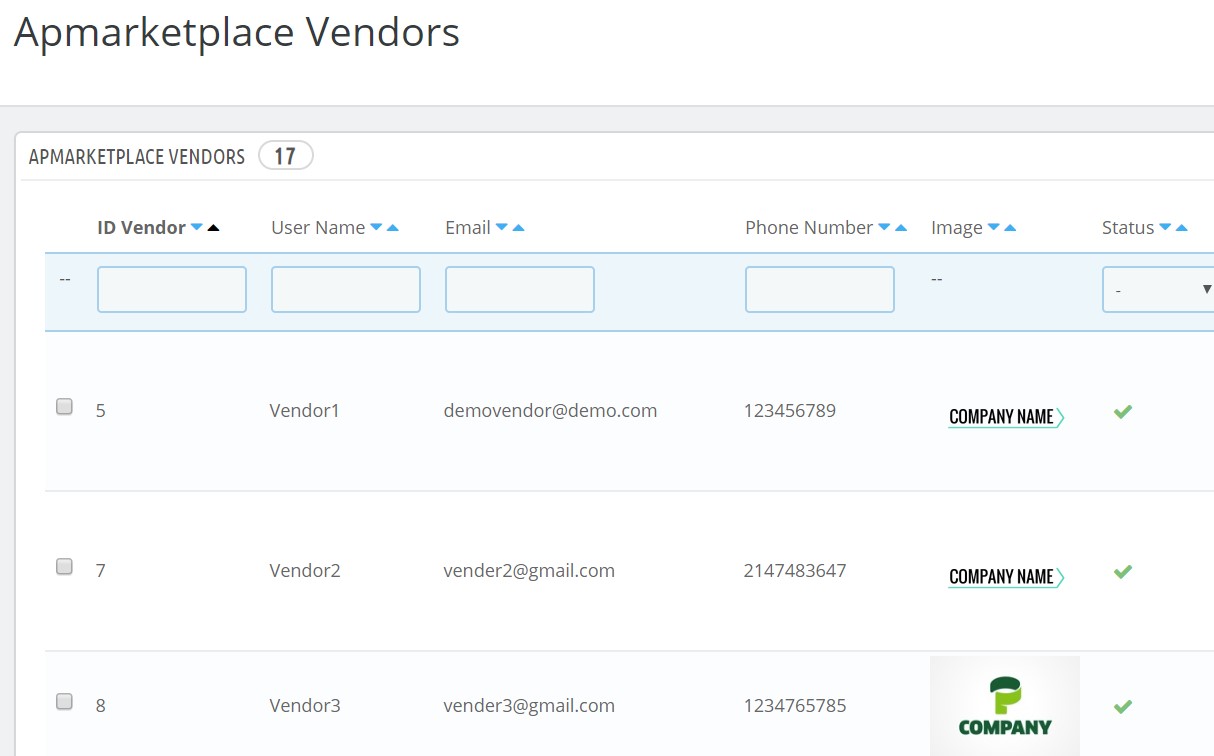
1. Manage Vendor Marketplace PrestaShop:
After creating new vendor account, admin can manage all vendors at the marketplace as ID vendor, Username, Email, Phone Number, Image, Status, Date Register.
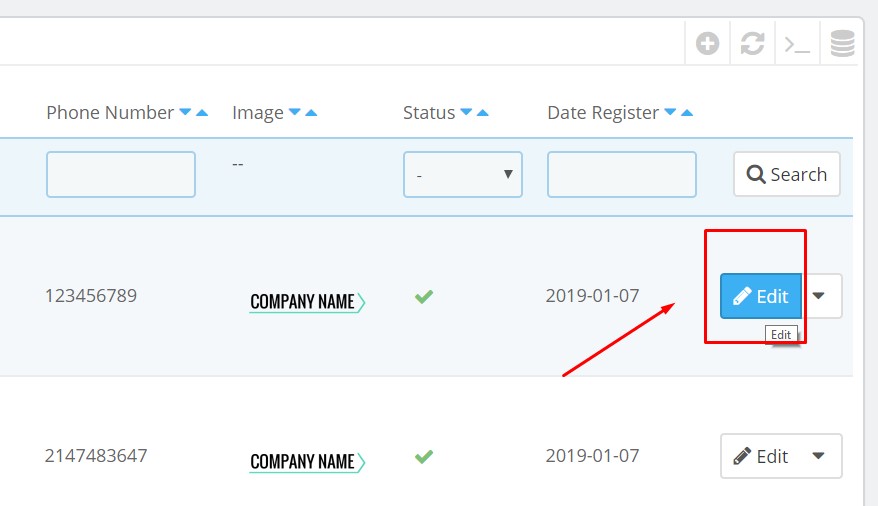
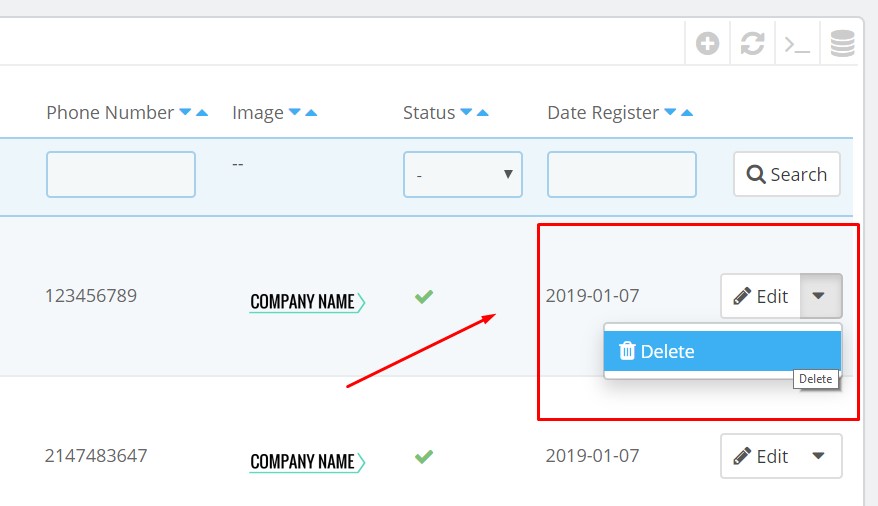
2. Edit Apmarketplace Vendor:
3. Delete Apmarketplace Vendor:
For the quick process, as soon as you want to active/inactive any vendors account, you can click:
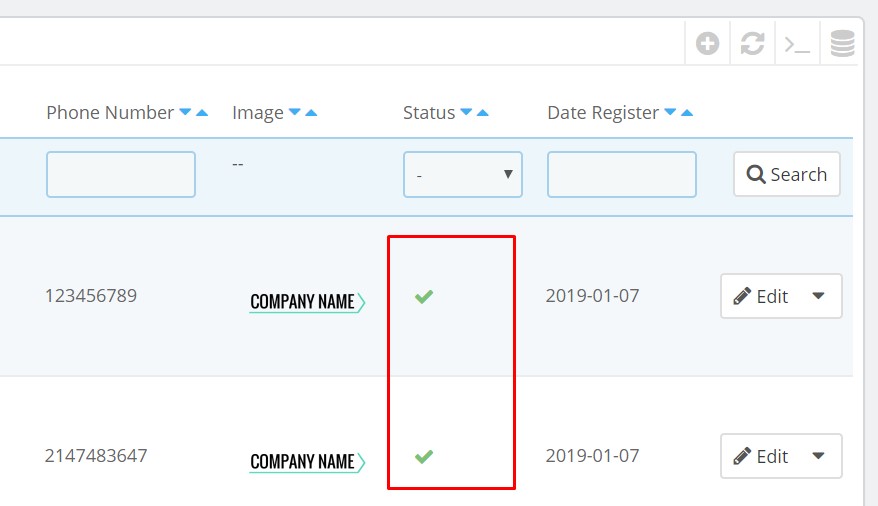
After all, “Save & stay” or “Save” the changes.
This is the end of tutorial “Manage Vendor Profile in Marketplace PrestaShop 1.7 “. Hope this tutorial help you well.
PrestaShop Marketplace Tutorials:
- Ap Marketplace: Upload Product to Marketplace – Leotheme
- Ap Marketplace: Manage Vendor Order & Pay Order in PrestaShop – Leotheme
- Ap Marketplace: Set Commission for Vendors in Marketplace – Leotheme
- Ap Marketplace: Config PrestaShop Marketplace Module – Leotheme
- Ap Marketplace: How to Install PrestaShop Marketplace Module – Leotheme
Related Prestashop Tutorials:
- PrestaShop 1.7.5: Manage Order Status PrestaShop 1.7 – Leotheme Blog
- PrestaShop 1.7.5: 2 Quickest Ways to Create Coupon Code PrestaShop 1.7 – Leotheme
- Prestashop 1.7.5: How to Add Carrier in PrestaShop 1.7 – Leotheme Blog
- 2 Quickest Steps to Create Full Width Slider PrestaShop 1.7.5 – Leotheme Blog
- PrestaShop 1.7.5: Create Virtual Product PrestaShop 1.7 | Leotheme Blog
- PrestaShop 1.7.5: Add Product Attributes & Combination | Leotheme Blog
- PrestaShop 1.7.5: How to Create Simple Product PrestaShop 1.7.x | Leotheme Blog
- PrestaShop 1.7.5: How to Add Languages PrestaShop 1.7 | Leotheme Blog
- PrestaShop 1.7.5 Features: All PrestaShop Features You Should Know
- PrestaShop 1.7.5: How to Update PrestaShop Theme version 1.7.5.0 | Leotheme
- How to Install PrestaShop 1.7 Default on Server | PrestaShop 1.7 Tutorial
- PrestaShop 1.7 Tutorial: How to Add New Category PrestaShop 1.7
- PrestaShop 1.7.5: How to Add Meta Tags in PrestaShop 1.7 – Leotheme
- PrestaShop 1.7.5: Edit Copyright Footer PrestaShop 1.7 | Leotheme